Showing posts with label Main course. Show all posts

Thursday, March 28, 2013

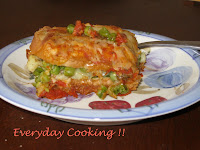
Quesadilla with Roasted Red Pepper spread, Spinach and Feta

Quesadilla is one of my favorite go to meals over the weekday especially with the large variety of tasty tortillas that are available now in grocery stores. It is quick, simple, flavorful and offers endless options for fillings. Also, quesadilla doesnt really have to be loaded with cheese the way most restaurants do (definitely amazing but artery-clogging) !! I prefer mine a bit less fatty and loaded with yummy beans and veggies. You control all that goes into the quesadilla and can add little to NO cheese! We like our quesadillas light on cheese and pretty toasty. Quesadilla for main course warrants it be a complete meal with proteins, carbs and fat and hence I like to layer it with a spread made of bean or nuts, some vegetable either sauteed, roasted or fresh and finish it with some cheese. If I really feel like splurging I might just finish it with a side of salsa and a dollop of sour cream or Greek Yogurt :-)

Notes:
  1. Spreads like hummus, roasted red pepper or any leftover bean dip work well. Infact I have had tasty quesadillas with simple chutneys like cilantro or mint. 
  2. You can bump up the protein by adding a few tbsp of cooked beans tossed in a little bit of oil and salt in the filling.
  3. If you would like to increase the veggies, raw (cucmber, olives, bell pepper etc) or roasted vegetables (zucchini, bell pepper, egg plants etc) can be added.
  4. I dont like the cheese to get very gooey and we find feta pleases our palate the best. Use any of your favorite cheeses instead of or in addition to the feta.

Ingredients
Cilantro-red pepper spread
1/2 cup toasted Almonds
1 roasted red pepper, chopped(store bought works just fine)
1/2 cup chopped cilantro
1 Jalapeno pepper (adjust as per taste)
1 tsp lemon juice
Salt, to taste

6 large tortilla (corn, wheat or others)
1 cup sauteed spinach or fresh baby spinach (see notes)
1/2 cup Feta or as needed
Oil to brush the tortilla
Sour Cream/Greek yogurt, Salsa (optional)

Method
  1. Pulse the toasted almonds in a food processor just until it is coarse. Add cilantro, jalapeno, roasted red peppers, salt and lemon juice. Run the processor for a few minutes just until you get a coarse paste. Add a few tbsp of water or a few drops of oil if the spread is too thick.
  2. Heat a griddle on medium low heat. 
  3. Spread one half of the tortilla with the cilantro-red pepper spread. Spread evenly a few tbsp of the spinach mixture. Sprinkle feta cheese. 
  4. Fold the tortilla over the cheese. Brush the outside with oil.
  5. Toast it over the hot griddle for about 3 min on each side. Remove from heat when you get the desired browning on the tortilla.
  6. Slice it into 4 triangles. Serve hot with a dollop of sour cream/greek yogurt and salsa.
Enjoy!!

Wednesday, February 6, 2013

Black-eyed Peas Pulao

Winter this year has been what winter should be - cold snowy and white !! Not that I am a huge fan of winter but there is something a little unsettling about those 60F non snowy days like we had last year during the peak winter months. And on cold wintry nights the thought of piping hot food on the table is very comforting and warms us from the inside.


So here is an easy one pot meal for cold winter nights - extremely flavorful that will make you momentarily forget the below zero temperatures outside :-) Just what the doctor ordered !!

Notes:
  • I have used black-eyed peas but any kind of beans (pinto, kidney beans, garbanzo beans etc) works great. 
  • Cilantro/green chillies combination is the major flavor that gives the kick to this dish, so feel free to adjust the quantity as per your taste. Mint can be substituted for cilantro or a mint/cilantro combination will work great. 
  • Serve this with a cooling cucumber raita (cucumber yogurt dip, recipe included) to balance the spices.
Ingredients
2 cups basmati rice (soak in 3 cups of salted water for 30 min)
1/2 cup Black-eyed peas (cooked al dente or canned will work fine as well)
1/2 cup mixed vegetables, diced (carrots, green beans, broccoli, cauliflower florets)
1 small onion (red or cooking onions), finely chopped
1/2 tsp cumin seeds (Jeera)
6 nos. whole cloves
3-4 Cardamom pods
1 Bay leaf
1/2 cup thick coconut milk
11/2 cup water
Salt to taste
2 tbsp oil

Grind to Paste
1/4 cup cilantro
2-3 serrano chillies (adjust to taste)
1 clove garlic, peeled
1/2 inch ginger, peeled

Method
  1. Heat oil in a saute pan on medium heat, add cumin. cloves, cardamom and bay leaf. Let it splutter. 
  2. Now add the onion and saute until the onions are turn light brown. 
  3. Add the cilantro/chilli/garlic paste. Saute for a few minutes until the raw smell disappears. 
  4. Add the mixed vegetables, stir and allow it to cook for a 2-3 minutes. 
  5. Drain the rice and add it to the above mixture. Now add the black-eyed peas. Stir until well mixed. Add salt to taste.
Stove-top method -
  1. If you plan to continue cooking on the stove top, pour the water and coconut milk to the above mixture. 
  2. Bring it to a rolling boil, reduce heat to low. And cover the pan tightly. 
  3. Let it cook for 15 - 18 minutes until all the liquid is absorbed. Check once around 12 minutes to see if the rice is done and if necessary can add another 1/4 cup water.
  4. Turn the heat off. And let it rest for 5-10 minutes before opening the lid.
Microwave method -
  1. After step 5, transfer the contents in to a microwave safe bowl. 
  2. Pour the liquids (water and coconut milk) to the above mixture. Stir once and cook it in the microwave for 15 - 18 minutes.
  3. Check once around 12 minutes to see if the rice is done and if necessary can add another 1/4 cup water. 
Fluff with a fork and serve hot with cucumber raita.

Cucumber Raita - Mix 1/2 cup greek or regular yogurt with 1 shredded cucumber, 1 finely chopped green chillies. Add 2 tsp of finely powdered roasted peanuts (optional). Season with salt.

Enjoy !!

Tuesday, January 24, 2012

A Taco Dinner - Black Bean Spinach stuffed Tacos with Cilantro Lime Rice

I love Mexican food and this is one type of cuisine I instantly fell in love with when I first came to the US. Mexican cuisine is very close to Indian cooking what with the use of multiple spices and beans. This was the only food I could identify with then and could really enjoy. But over the years my taste buds have certainly evolved with exposure to so many different cuisines. In the past 10 years I have come to love my pastas, burgers/veggie patties, pitas/falafels yet my love for Mexican cuisine remains unchanged. I do like eating out at Mexican restaurants but more often than not the dishes come loaded with cheese which I actually find off putting. Fortunately cooking Mexican food at home is pretty simple and I love the fact that I can control the ingredients that go into it. I try to strike a good balance between using enough beans and vegetables with just enough cheese/sour cream to make a perfect Mexican dinner that suits our tastes.


I made corn tortilla from scratch and having a tortilla maker makes it very easy to roll out the tortillas. But if you dont have a tortilla maker, the dough can be rolled between two pieces of parchment. Feel free to use store bought ones if you are pressed for time (hard or soft shell tacos will work fine). This recipe is more of a method than a strict recipe you need to follow. Any kind of beans and greens can be used and you can vary the fixings (Salsa, sour cream, avocado etc) as you like. I have used chilli sauce that my cousin got for us from Mexico and I must say they were awesome and SPICY. I used green hot sauce and red hot sauce in place where I would normally use jalapenos.
Cilantro-Lime Rice -I normally dont make rice when I can get away with just tortillas but I wanted to try this cilantro lime rice that we had in one of the Mexican restaurants on our trip to Phoenix (the restaurant is Abuelos, in Chandler, AZ). This is a very simple rice to make, nothing too complicated with just 3 ingredients or so.Its a breeze to prepare and it makes this a complete Mexican dinner like the one you would eat if ordering in a restaurant!!

Ingredients
Corn Tortilla
11/2 cups Masa Harina (I used P.A.N pre-cooked white corn meal, available in the international section of most grocery stores)
11/2 - 2 cups warm water (or as needed)
Salt to taste

Stuffing
2 cups cooked black bean (can or fresh)
1 cup spinach, Kale or Swiss Chard, chopped
1 clove garlic, minced
1 tsp roasted cumin powder
1/2 tsp Mexican hot sauce or chopped jalapeno
Salt to taste
Garnish - Finely chopped tomatoes, onions (or salsa), avocado, cilantro, sour cream

Method
  1. Mix masa harina and salt in a large bowl. Add one cup warm water and mix it well into the dough. Add more water as necessary to form a soft dough. 
  2. Cover with a kitchen towel and let it rest for 10 min.
  3. Pinch a lemon sized ball from the dough and roll it into a ball. Repeat with rest of the dough. 
  4. Line the two discs of the tortilla maker with plastic wrap. Place a lemon sized ball of the dough in the lower disc of the tortilla maker. Press the upper disc to form a flat round tortilla. 
  5. Heat a cast iron or a non-stick griddle on a medium flame. When the griddle is hot place the shaped tortilla on the griddle. Let it cook just until the bottom gets brown spots. Flip it over to cook the other side.
  6. Remove it on to a aluminum foil to keep it warm. 
  7. Repeat with the rest of the dough. 
Stuffing
  1. Heat oil in saute pan, add garlic, jalapeno (if using) and cut greens. Saute for a few minutes until the greens wilt. Cook a little longer if you like the greens to be soft. Add cumin powder, hot sauce and salt. Stir well.
  2. Mash half the quantity of the cooked black bean. Add this to the above mixture. Add about 1/4 cup water, lower the heat and close the pan. Let this cook for a minute or two until the spices sink into the beans and the greens. 
  3. Now add rest of the beans. Stir and cook for a few more minutes on a medium low flame. 
Assembling
Take a corn tortilla, fill it with 2 -3 tbsp of the beans/greens mixture. Top it with any or all of the condiments listed under garnish. Serve with cilantro lime rice.

Cilantro-Lime Rice
  1. Cook 1 cup long grained rice (like Basmati) with 2 cups of water and 1/2 tsp salt. ( I used a microwave rice cooker but feel free to use any method you would normally cook rice). Set aside for 5 min or so, until the steam settles down. 
  2. Fluff the rice with a fork and transfer it into a shallow dish. Pour 2 tsp oil (canola, vegetable oil or light olive oil) over the rice, add 1 tbsp of finely chopped cilantro and juice from 1 lime. Stir to combine and take care not to break the rice grains. Taste and adjust salt and add more lime juice if need be. Serve as a side to tacos, burritos, fajitas etc.
Enjoy !!

Monday, November 21, 2011

Spicy Black Bean Cakes


The first time I had a version of the spicy cake was back in my graduate school days in the small town of Ames, IA. One of the micro brewery/restaurants there had these spicy bean cakes as an entree item. In the early 2000's when I was new to the US, being a vegetarian meant limited eating out options especially in a small town like Ames. Most restaurants would have just one or two vegetarian options and the worst I have seen for a vegetarian option was just a salad with no protein in it whatsoever. Things have come a long way since then and with vegetarianism gaining immense popularity in this part of the world most restaurants have made their menus more vegetarian-friendly. So when I first saw this spicy bean cake in the restaurant five years ago, I was pretty excited. I dont remember much of the what the spicy bean cake tasted - two things stand out clearly in memory though - it was made of black bean and it had a very distinct smoky flavor.

Now to the matter at hand. The recipe I have here uses pretty simple ingredients - I have used roasted cumin powder to give the smoky flavor and the heat comes from the jalapeno peppers. Brown rice is what forms the binding material to keep the cake together. This is a very nourishing all in one meal. There is enough carbohydrates and proteins that a simple salad on the side makes a perfect dinner. Other ways to serve this cake is like a burger between slices of bread or as a wrap in tortilla/roti with condiments of your choice. I made a very simple garlicky buttermilk dressing similar to an aioli.

Ingredients
1 15oz can or 11/2 cups cooked black bean
1/2 cup onions, chopped
1 clove garlic, minced
1/2 cup carrots (optional)
1/2 cup cooked brown rice
1 jalapeno pepper, finely chopped (or any other green chili pepper), adjust to taste
1 tsp cumin powder
2 tbsp cilantro, finely chopped
1 tbsp oil + more for shallow frying
salt to taste

For Buttermilk aioli
1 cup buttermilk
1/2 tsp cayenne or red chili powder
2 clove minced garlic
1/4 tsp stone-ground mustard
A pinch of dill (dried) or 1/2 tsp finely chopped fresh dill
2 tsp lemon juice
Salt to taste

Method
Buttermilk aioli
  1. In a medium bowl whisk the buttermilk, add all the ingredients and mix well. 
  2. Taste and adjust the seasoning.
  3. Set aside.
Black bean cakes
  1. Heat 1 tbsp oil in a pan over medium heat. Add garlic, jalapeno and onions. Saute until the onions turn translucent.
  2. Add carrots if using, saute for a minute or two and then add black beans, cumin powder and salt. 
  3. Saute for two more minutes. Finally add brown rice, mix well and remove from the heat. 
  4. Let it cool slightly, add cilantro if using and then mix well so the black beans and the rice looked mashed and well combined. Taste and adjust for seasoning. 
  5. Take a lemon sized ball of the mixture and flatten to make a 1/4 inch thick disc. Repeat with the rest of the mixture. At this point you can either proceed to the next step immediately or  refrigerate for a few hours to overnight.
  6. Place a saute pan or a griddle on a medium flame, pour 1 tbsp of oil and swirl so the bottom of the pan is well-coated with oil. 
  7. When the oil is hot enough lay the flattened cakes on the pan. Make sure the patties do not touch each other. Cook for 3-4 min or until the bottom is brown. Flip over, cook the other side till brown. 
  8. Remove on a plate and serve warm with a salad and dressing.
Enjoy !!

Saturday, April 23, 2011

MMC Challenge 8 & 9 (Part 2) - Bread Lasagna (with potatoes and peas filling)

Here's the ingredient 8 & 9 of MMC challenge 

Ingredient 8: Green Peas
Ingredient 9: Standard White bread

This twist in the tale was M's way of getting me out of my writer's block as well as winter blues and inspire me to think outside the box. The rules he came up with are:

1. You have to use both ingredients 8 and 9 in making the dish. 
2. Both should be considered as main ingredients and hence should be provided with equal importance in quantity and in taste.
3. You have to make 2 dishes and that is why we are counting them as 2 ingredients.
4. The dishes should not be from the same category (Appetizer, Main course, Side, Dessert)

Here's part -2 of this challenge.


For the second part of this challenge, I decided to go with a twist on lasagna. Normally my instincts guide me into making an appetizer/snacks since I would eat an appetizer or a snack for a meal instead of the main course !! When I go to a restaurant I end up liking the options in the appetizer section more than I do the main course that I order appetizer as my main meal :-) So given my immense liking towards appetizers I had to resist the urge and decided to go with a main course.


This recipe is almost a fusion between lasagna and a sandwich. I have used the principle of lasagna (layering the bread with tomato sauce) but have used a stuffed sandwich instead of pasta for the layering. I like lasagna and potatoes/peas stuffed sandwich. So no surprise here that I loved the final result which had the taste and texture of both lasagna and a sandwich. Thinking about it, maybe I should rename this recipe as "Sandwich lasagna" :-)

Notes:
  1. Though it looks like the recipe involves too many steps and elaborate, this is actually nothing more than assembling a layer of sandwich with tomato sauce and cheese.
  2. If using fresh tomatoes instead of the Hunt's sauce, blanch the tomatoes. Remove the skin and seeds and puree.
  3. Season both the sauce and the stuffing generously. Taste and adjust the seasoning before assembling the lasagna. Remember there is enough bread in the recipe to absorb the spices. If under seasoned, the dish may turn out bland.
  4. Use a wide shallow pan to make the filling. The potatoes and peas will crisp up better if there are spread into as thin a layer as possible in the pan.
  5. Toasting the bread - Use either the oven or a simple toaster to toast the bread.

Ingredients
For the Sauce
Hunt's tomato sauce, plain - 14 oz  (see notes)
Diced tomatoes (fresh or canned) - 1 cup
Garlic - 2 cloves, minced
Sugar - 1 tsp
Red chili flakes - 1 tsp (or more)
Basil dry - 1/2 tsp
Salt and pepper to taste
Olive oil - 2 tbsp

Peas and potato stuffing
Potatoes , medium - 3, diced into small cubes
Peas, frozen thawed - 2 cups (remove excess moisture from the peas using a towel)
Black pepper, freshly ground  - 2 tsp or more
Salt to taste
Olive oil - 3 tbsp

White bread 6-8 slices
Oil or melted butter - as required
Garlic - 2 cloves
Mozzarella or Italian blend cheese - 2 cups (more or less as you'd like)

Method:
Sauce:
Heat oil in a sauce pan over medium heat.
Add red chili flakes and garlic. Let it cook for a minute.
Now add the diced tomatoes and season with salt.
Let it cook for 5 minutes, until the tomatoes are well cooked.
Now add the tomato sauce, sugar and basil. Let it boil for 10 min.
Add more salt if required and pepper. Taste and adjust seasoning.
Take it off the heat and set aside.

Filling:
Heat oil in a wide shallow pan.
Add potatoes and spread it into a single layer (so most of the potatoes are in direct contact with the pan).
Sprinkle some salt. Do not stir. Cover and let it cook for a few minutes until the bottom starts browning.
Now stir the potatoes, add peas. Let it cook until the potatoes are done and the peas get crisp.
Add more salt and pepper. Taste and adjust seasoning.
Remove from heat and set aside.

Preparing the bread:
If toasting in the oven, brush each side on the bread with oil or melted butter. Place the slices on a sheet pan, bake for 10 min at 400 F or just until the bread gets brown and toasty.
If using a toaster - toast the bread slices as you would and then brush with some oil or melted butter.
Rub both sides of the toasted bread with a garlic clove. Set aside.

Assembly: 
Pre-heat the oven to 375F.
Grease a baking dish with oil.
Spread a thin layer of the tomato mixture in the baking dish.
Layer a few bread slices (I used 31/2 slices) to cover the entire baking dish. Break the slices to make sure you fill the whole surface with bread.
Spread a little more than half of the potato/peas mixture on the bread layer. Spread 3/4 cup of cheese on this.
Cover this layer with another layer of bread.
Spread the remaining potato/peas layer and then the rest of the tomato mixture.
Sprinkle the remaining cheese on top, making sure to cover the entire baking pan.
Bake for 30-40 min or until the cheese melts and bubbly.
Remove it from the oven and let it cool a bit before slicing.
Serve with a side salad.

Enjoy !!

Saturday, September 11, 2010

Vegetarian Black Bean Chili

Its been pretty hectic and fun times training and playing with Tipoo. Guess you guys have to put up with my Tipoo tales for a few weeks now, what with every single one being eventful - happy for most part and really tiring at the end of the day !! For much of the day I am the primary care-taker and am I glad that puppies sleep a lot. But once he wakes up I am running around behind him either playing with him or making sure he doesnt chew everything he finds in his way. By 6 PM both of us are eagerly waiting for my husband to come home, so he will relieve me of the running around :-) If he gets delayed at work for some reason, then I have a crazy puppy on my hands. All those walks and playing fetch saves our day. And its a sight to see Tipoo welcoming my husband home from work. I fade into the back ground for sometime until the two boys have had their little "reunion" :-)

After such a busy day, I rarely have the energy or enthusiasm to cook elaborate dinner. I prefer one pot meals that is both easy on the time and makes a complete dinner. Most of my leisurely cooking now-a-days have been relegated to the weekends when my husband takes complete care of the little guy.


Anyway, coming to today's recipe, I have been planning to make chili for a long time now. Finally I did make some a few weeks ago and it came out very good. There are a lot of different recipes for vegetarian chili and as always I have taken ideas from few different recipes to make one that best suits our taste. I think the addition of bulgur is what gives the texture and body to the recipe. This is a wholesome and healthy one pot recipe since it has everything you need to make a complete meal.

Notes:

  1. A combination of black beans and red kidney beans works very well for this recipe.
  2. If using fresh beans, soak it overnight and cook it till its done but still firm.
  3. Use Jalapeno sparingly, I did go a bit overboard and my chili turned out a bit spicier than what I would have liked.
  4. I havent included celery in my recipe but if you have it on hand you can surely use it for the added flavor.
  5. Bulgur makes the soup to be a bit on the thicker side. So adjust the quantity according to the final consistency you'd like to have.

Ingredients
1 14oz can Black beans
1/4 cup bulgur
1 yellow onion, finely chopped
1 green bell pepper, finely chopped
1 medium carrot, finely chopped
2 zucchini, chopped
1 14oz can diced tomatoes
2 tbsp tomato paste
2 cloves garlic, minced
1 jalapeno, finely chopped (adjust as per heat)
2 tsp chili powder
2 tsp paprika
2 tbsp cumin powder
1/2 tbsp coriander powder
2 tbsp molasses
2 tsp oregano
2 tbsp olive oil
3-4 cups water or vegetable stock (or as required)

Garnish:
Sour cream
Monterey Jack or mexican blend cheese
cilantro

Method
  1. Heat oil in a large heavy-bottom sauce pan or a dutch oven. Add onion, garlic and jalapeno.
  2. Saute it for a few minutes until onions turns brown, almost 4-5 minutes.
  3. Now add carrots (and celery if using). Saute it for 2 minutes.
  4. Add bell pepper, zucchini, tomatoes and tomato paste. Saute it well until the tomatoes are well cooked. It takes about 5 minutes or so.
  5. Now add all the spices, starting from chili powder to oregano. Add bulgur and stir well.
  6. Let it cook for 2 minutes and then add water starting with 2 cups.
  7. Bring this to a boil, close with a lid and let the soup cook for 15 minutes or so.
  8. Keep a close watch to make sure it has enough water. Add more water as the chili cooks as necessary.
  9. Finally add salt, adjust seasoning and spices.
  10. Allow it to boil for 5 more minutes or until done.
  11. Ladle it in a bowl, garnish with cilantro, sour cream and cheese.
  12. Serve with corn bread on the side.

Enjoy !!

Friday, May 21, 2010

Coconut Milk Pulao (Pilaf) - Rice Cooker method

Coconut milk pilaf/pulao is yet another of my favorite one pot meal. This is a sure shot crowd pleaser and I make it for potlucks or parties. This is one of the recipes that I never had tasted when I was growing up - my mom very rarely made dishes using coconut milk. On the other hand my husband loves this dish. It's is one of his favorite "Mom's dish". I havent had a chance to taste my MIL's coconut biryani yet, so am not sure how the traditional recipe tastes like. But my husband assures me that mine taste really good and pretty close to what his mom makes. I think that's a good enough compliment for a dish I havent even tasted before I actually started making it myself.


Notes:

  1. Soak basmati rice in generous quantities of salted water. This helps to keep the rice white as well as make sure the rice doesnt turn sticky on cooking.
  2. Adjust the spices according to your tastes. Following measurements give a mildly flavored biryani.
  3. Adjust green chilies according to the heat level you'd prefer.
  4. I used rice cooker but am sure microwave or pressure cooker methods should work fine as well.
  5. 2 cups liquid (1 cup coconut milk and 1 cup water) was just sufficient to get my rice well cooked. But if you feel the need for more water, do so at the very end if the rice is still under cooked.
Ingredients
2 cups basmati rice (see notes)
1 cup coconut milk
1 cup water
1/4 cup finely chopped onions
1/4 cup diced carrots and peas (frozen or fresh)
1 tsp cumin (Jeera)
5 cloves
4 cardamom
1 bay leaf
4-6 green chilies (or as per taste)
1 tsp ginger, minced
8-10 Cashews, halved
1 tbsp butter or oil
Salt

Method
  1. Soak rice in salted water for 15-30 minutes.
  2. In a saute pan heat oil/butter. Add all the ingredients from cumin to cashews. Let the cashews turn light brown.
  3. Add onions, saute it for 2 minutes or just until onions turn translucent.
  4. Drain rice. Add this to the rice cooker. Add sauteed vegetables and 2 cups of water.
  5. Switch the rice cooker on and let it cook. Add salt just before the rice is completely done. Stir.
  6. Garnish with cilantro.
  7. Serve with a spicy korma or curry.
Enjoy !!

Wednesday, May 19, 2010

Spring Orzo Salad

We have been reeling under damp and gloomy weather for the past couple of days. Spring here refuses to go away and its unseasonably cold. Maybe I angered the "Spring gods" with my ramble a few posts ago, claiming my less than friendly relations with the spring season :-) So if an apology will make this cold spring go away and warm summer to arrive, I can very well offer a thousand "Sorrys" :-) And if sorry wont cut it, here's a salad honoring the season !!


Farmer's market hasnt sprung up yet in our region what with the cold spring, frost etc. But there are some really fresh vegetables that have started arriving in the grocery stores. I havent been cooking much of late and I've been looking for ways to avoid cooking or even if I do, spend as little time as possible in the kitchen. I have subsisted on sandwiches (with hummus or cheese) for the past few days but realized I wasnt getting much veggies. Also, I had some green squash and bell peppers that needed my immediate attention before they lose their freshness. I wanted a complete quick-cooking meal using up the vegetables I had on hand. I figured salad was probably my best option to both use up the vegetables and do so in minimum amount of time. So I cut them up, sauteed a little bit to take the edge off and tossed them with some orzo and a very simple dressing. There was my quick dinner, all healthy and tasty.

Notes:
  1. Asparagus or any other spring vegetable will work fine in this salad.
  2. If you like the "garlicky" taste, add an extra clove of garlic.
  3. Fresh herbs like basil or parsley can be used as a garnish.
  4. I made a very simple dressing but feel free to use any oil/vinegar based dressing.
Ingredients
3/4 cup Whole wheat orzo
1 medium-sized Zucchini
1 medium sized bell pepper
1/2 tsp red chili flakes
1 clove garlic, minced
1 tbsp olive oil
Basil or parsley (optional)
Parmesan Cheese (optional)

Dressing:
2 tbsp olive oil
2 tbsp lemon juice (or as required)
1/2 tsp sugar
1 pinch red chili flakes (adjust according to taste)
Salt to taste

Method
  1. Cook orzo in a large pot of boiling water for about 7-9 minutes. Drain and set aside.
  2. In a bowl whisk all ingredients under dressing. Taste, adjust salt and lemon juice. Set aside.
  3. In a saute pan, heat 1 tbsp oil. Add red chili flakes and garlic.
  4. Add chopped vegetables. Saute for 5-7 minutes. Just until the vegetables are tender but firm.
  5. Add salt, taste and remove from heat.
  6. In a large bowl, mix the cooked orzo and veggies. Add the dressing, toss well. Taste, adjust seasoning.
  7. Garnish with fresh basil/parsley and/or parmesan.
This will be my entry to Preeti's "Green gourmet" event.

Enjoy !!

Wednesday, May 12, 2010

Moong Dal Dosa (Yellow Split Pea Crepes)

When I started blogging almost 2 years ago, I didn't realize what I was getting into. All I knew was I needed a place to document my recipes and so I started out with using Google documents. Then someone suggested giving blogging a shot. I wasn't sure if I was up for it, both time wise and also doling out new/interesting recipes every so often. At some point my husband managed to convince me to give it a shot and said I might even start enjoying it. He even offered to be my critic as well as the editor and that was an offer I couldn't refuse :-) Looking back, I am glad he said what he said for I think this is one of the best hobbies I have taken up in recent times. I sure haven't been as regular as I would like to be. In fact, I have had times where I slacked off, felt guilty for not giving enough attention to blogging. But hey, its supposed to be a hobby and not a chore. So I figured its ok for me to blog as and when I like and how much ever I like.


As much as I love blogging, it is still work - getting the recipe right, making sure I remember the measurements, take good pictures and finally put it down in words. I really admire a lot of my fellow bloggers who blog in spite of a busy schedule (with kids, full-time jobs just to mention a few) and blog they do very regularly. So hats off to all you guys out there and I should say you guys are a big motivation. I am ever so grateful to my readers who actually take time to go through my ramblings and leave their wonderful comments. And to see "# comments to be moderated" in my dashboard really makes my day and makes me want to blog more !! To add yet another dimension to my blog, I am grateful that my friend stepped forward to start MMC challenge. Because of him I have experimented with some interesting ingredient combinations and he's been kind enough to spend his time testing my recipes and giving his feedback. I am hoping we will continue this little venture of ours and make it even more interesting.

I think I got nostalgic because it will be 2 yrs this June since I started blogging. That probably is the reason for my senti acknowledgment today !! Guess I should stop rambling now and jump to my recipe of the day. The following recipe is one of the dosa varieties and relatively quick cooking one. I love dosa and idlis in any form more so now than when I was growing up. I especially love the instant varieties where I don't have to plan ahead. Moong dal dosa is a pretty simple, relatively quick cooking dinner and a very healthful one as well. Split moong dal soaks pretty fast when compared to the whole green moong that we use to make pesarattu. Also, I find moong dal dosa lighter than the regular adai where I use 3 different type of lentils. Served with chutney and yogurt, this makes a complete and a satisfying meal.

Note:
  1. I soak moong dal for 3-4 hrs, but I have gotten away with soaking it for as little as 2 hrs.
  2. I make the batter pretty thick. This way I can use the batter to make dosa or fry it in oil to make lentil fritters (similar to vada).
  3. For dosa: I take a part of it out and dilute the batter to a dosa/pancake consistency.
  4. For fritters: Add chopped onions and drop a spoon full into an appam pan or ebelskiver pan.

Ingredients:
3 cups moong dal, split
1 cup rice flour
4 green chillies (or to taste)
1 tsp coarsely chopped ginger
Water as required
Salt to taste

Method:
  1. Soak moong dal for 3-4 hours.
  2. Grind the moong dal with green chillies and ginger to a smooth paste. Add just enough water to facilitate the grinding process.
  3. Add the rice flour to this mixture. Mix well by hand or in the food processor.
  4. For dosa, dilute the batter with enough water to get a pancake/dosa batter consistency.
  5. Take a ladle full of the batter and spread it into a thin circle on a hot griddle.
  6. Drizzle a few drops of oil along the edges. Let it cook till the bottom browns.
  7. Flip, cook for another 30 seconds or so.
  8. Remove it on to a plate.
  9. Serve with chutney and yogurt.

Enjoy !!

Tuesday, May 4, 2010

Cauliflower Sambar


"Confessions of a cook book-aholic?" I am a sucker for cook books. I go weak in my knees when I walk through a book store and see all those colorful cook books adorning the shelves. Don't know what I am addicted to - the glossy prints, tempting pictures, smell of the fresh print? Whatever it is, I find it very hard to resist the temptation. Thank god for Amazon - the wish list option and a great spouse who actually is very kind towards my obsession (hope he takes the hint..lol..). I can proudly say I am an avid cook book collector and my loot is prominently displayed in the house. But the most intriguing part of all this is I seldom follow the recipe to the "T", most of the time am in a hurry or just plain lazy to open the book measure the ingredients etc. I curl up with my cook books and read it like I would a regular novel/fiction and if something interests me I make it a point to try it out before it is displaced from my memory. Am sure most of you out there will relate to this. But to be fair, I do once in a while have the cookbook open and follow the recipe meticulously - with great results.

I can categorize my cook books depending on how I use them. For instance, books such as Mark Bittman's How to cook Everything Vegetarian and Jacques Pepin's Complete techniques are my bible/encyclopedia category. There are a few other which I use to look at the pictures and drool :-) And some more which are my go-to books for authentic Indian cooking such as Dakshin by Chandra Padmanabhan and Cooking at home with Pedatha. I love the simplicity of the recipes and the lovely pictures in Dakshin especially.

The following recipe, cauliflower sambar, is my adaptation of the original recipe found in Dakshin. I took a shortcut by substituting sambar powder where the original recipe calls for grinding the masala. But the end result was very tasty. My husband says it tastes like a hybrid between sambar and korma !!

Ingredients
1 medium sized cauliflower (washed, separated into florets)
2 tomatoes, coarsely chopped
1/2 cup toor dal
1/4-1/2 cup thick tamarind water (or as required)
1/4 cup unsweetened coconut milk
3 tbsp Sambar Powder
1 tsp turmeric
asafoetida, a pinch

Tempering
1 tsp urad dal
2 tsp mustard
4-6 curry leaves
2 red chillies
2 tsp oil
A pinch of asafoetida

Method
  1. Pressure cook toor dal along with one cup water and tomatoes, until the dal is well-cooked (normally 4 whistles and wait for the steam to be released naturally). Alternatively, you can cook the dal on the stove top for 30 minutes. Mash the dal and tomatoes well. Set aside.
  2. In a quart pan, heat oil. Add urad dal. Let it turn light brown in color. Now add the mustard. Wait until it starts spluttering. Now add red chillies, curry leaves and asafoetida.
  3. Add cauliflower, turmeric, asafoetida and some salt. Saute for a few minutes, until cauliflower is tender.
  4. Add tamarind water. Boil for for 3 minutes or until the raw smell of the tamarind disappears.
  5. Add sambar powder. Mix well.
  6. Now add the mashed dal/tomatoes. Taste, adjust salt and seasoning (add more sambar powder if required).
  7. Allow it to boil for a few more minutes. Add the coconut milk. Allow it to boil just for a minute.
  8. Remove from heat. Serve hot with rice, idli, dosa or aappam.

Enjoy !!

Wednesday, March 24, 2010

Ragi Dosa (Finger Millet Crepes)

Ragi or Finger millet is very healthy and I remember my mom making porridge or kanji with ragi. One other dish that I remember from my "wonder" years, though only vaguely is Ragi urundai or Ragi Mudha where boiled raagi is mixed with jaggery. Since I do not seem to remember much about the ragi urundai, I think its safe to assume it wasn't one of my favorites. Maybe if I try it now, I might have a different opinion but that's for another day. Anyway, coming back to the present, I am trying to include a variety whole grains in our diet to make a healthy meal without sacrificing the taste. I find that the best way to incorporate these without having to try too hard is to substitute whole grains in places where we use rice or refined flour. Thus was born Ragi dosa.


I wanted to try the instant dosa variety but surprisingly I had the mood and enthusiasm to actually make fermented idli/dosa batter. So I decided to use ragi in place of rice and grind it along with urad dal, ferment it for 12 hrs or so as we would do for the traditional idli. Looking up online I found a number of recipes for making ragi idli/dosa batter and I realized it might not be wise to remove rice completely from the equation. So I used 2 parts ragi, one part rice and one part urad dal for my batter. I should say I am pretty pleased with the result.

Note:
  1. Ragi flour is widely available in Indian grocery stores. You can also use whole ragi if you have them on hand. Soak it for a few hours and then grind it separately.
  2. Fermentation of this ragi containing batter took longer than my usual idli batter. I had to wait almost 18 hrs or so before I could say it was fermented enough.
  3. Once the dal is well soaked, decant the water. Set aside half a cup of this water and discard the rest. I find that using the water that the urad dal soaked in, while grinding helps the fermentation process.
  4. I started out with making idlis with this batter as soon it was fermented enough, 2 days later I made dosa and a few more days later I made uttapam. All three dishes came out just fine.
Ingredient
2 cups ragi flour (Finger Millet flour)
1 cup Idli rava (Cream of rice)
1 cup whole urad dal (White lentils)
Salt to taste

Method
  1. Soak urad dal for 5-6 hrs in water. Set aside half a cup of the water that the urad dal soaked in. Discard the rest. Grind it to a smooth paste with just enough water in a food processor, a blender or a wet grinder.
  2. Mix the idli rava and ragi flour (or ground ragi, if using whole grain) to the urad dal paste. Add more water to get a thick consistency. You can mix it by hand but I find using a food processor much easier to mix all the ingredients evenly.
  3. Transfer to a large bowl. Add salt, mix well. Make sure your bowl is large enough to hold the batter once it ferments and rises.
  4. Place the bowl in a warm place and let ferment. This takes anywhere between 12-24 hrs.
  5. Now you can use this batter to make either dosa, idli or uthappam.

For Dosa:
For dosa, pour a ladle full of the batter on a hot griddle and spread it into a thin circle.
Drizzle a tsp of oil (preferably sesame oil) around the dosa. Flip when the bottom turns light brown in color and cook the other side for a minute or so.
Remove the dosa from the pan. Serve hot with sambar, chutney and/or milagai podi.

This will be my entry to Divya's "Show me your whole grain" event.

Enjoy !!

Tuesday, March 16, 2010

White Beans and Chickpeas Burger


MMC Challenge is on a brief hiatus until Mid-April as our judge is going back home on an important mission :-) In the meantime I thought its a good idea for me to get back to my usual blogging. This week's recipe is one version of the vegetarian burger I make at home. I normally make burger with veggies and any type of beans that I have on hand. I like my burger without too many toppings or condiments. So the best way for me to incorporate veggies is to use them up to make my burger. This particular version uses white beans and chickpeas with tahini paste to give it a Middle-Eastern flair or falafel like taste. Following is just a method, you can experiment with any type of beans/veggie combination along with fresh or dried herbs that you have on hand.

Note:

  1. I have used canned beans here since I didn't plan ahead to soak the beans. If you have dried beans soak it in water overnight and then boil until the beans are cooked.
  2. I normally do not like to add bread crumbs, eggs or flour in my burger and hence my burgers turn out softer than the normal frozen burger that you'd normally get in the stores.
  3. Having said that, feel free to add any of the above ingredient if you dont like a soft burger.
  4. I have used stove top method to cook the burger but am sure using an oven would also work fine.
Ingredients:
11/2 cups White beans/Cannellini beans (boiled or canned)
11/2 cups garbanzo beans (boiled or canned)
1 clove garlic
1 small onion, diced
2 carrots, diced
1 cup fresh mint leaves
3 tsp red chili flakes
2 tsp cumin powder
11/2 tbsp tahini paste
2 tbsp olive oil
salt to taste

Method:

  1. Heat 2 tbsp oil in a pan, add garlic, onions and carrots.
  2. Saute until the carrots are tender.
  3. Add chili flakes, cumin powder and saute lightly.
  4. Now add the mint leaves and turn off the heat.
  5. In a food processor with the steel blade attachment, add the beans and the cooked mixture.
  6. Run the food processor just until the mixture blends well (take care not to make it into a smooth paste).
  7. Make half an inch patties and refrigerate for few hours.
  8. Heat 1 tsp of olive oil in a skillet and brown the burgers.
  9. Serve on a english muffin, hamburger bun or multigrain bread with onions, tomatoes or any other topping of your choice.
This is my entry to Susan's event MLLA-21 guest hosted by Super Chef of Mirch Masala blog.

Enjoy !!

Wednesday, February 17, 2010

MMC: Ingredient 1 - Fennel

Here's my first MMC challenge - fennel

Fennel & Carrot Soup

Fennel is good for health in many ways and as we Indians know, is a good palate cleanser and is very good for digestion. A quick google search gives a whole slew of websites packed with helpful healthful info on fennel. I wanted to bring out the natural goodness of fennel yet didnt want it to be overpowering. Hence, I paired it with carrots and kept the flavorings to the minimum. This is a extremely simple soup that contains ingredients that are easily available and one that you'd most likely have in your pantry. What better way to start a dinner...


Note:

  1. Wash and cut the stem/fronds off the fennel bulb (Save a tsp of fronds to garnish before you discard them). Quarter it and remove the hard center part (core). Dice each quarter into half, you will end up with eight pieces.
  2. I find it very easy to use my oven to roast veggies, 'coz this gives me whole a half-hour to do a bunch of other things. If you do not have an oven or dont want to use it for some reason, no problemo. Just saute the veggies on the stove top and let it brown a bit, then continue with step 4.
  3. I have used frozen corn in my recipe. My husband who usually does the taste testing for my recipes thought corn would make a great addition. So I incorporated his suggestion. Corn has a tendency to thicken the soup. If you'd prefer a thinner version, I would suggest adding the corn kernels (thawed) at the final step as a garnish and NOT blend it with the roasted veggies (step 4).
  4. Avoid sour cream/yogurt for a vegan version of this recipe.

Ingredients:
1 big fennel bulb, (cut into 8 pieces)
2 carrots, diced
1/4 cup white onions, sliced
1 clove garlic
1 tsp thyme (fresh or dried)
2 tbsp frozen corn kernel, thawed (see note)
2 tsp black pepper powder
salt, pepper to taste
1 - 1 1/2 cups water or vegetable stock
2 tbsp olive oil
Lime juice from one small lime
1-2 tbsp sour cream/yogurt/greek yogurt (optional)
1 tsp fennel fronds (optional)

Method:
  1. Pre-heat oven to 450-500F.
  2. Take 2 tbsp of olive oil in a bowl, add carrot, fennel, onion and garlic. Sprinkle some salt, thyme and black pepper. Mix well.
  3. Roast this in a sheet pan for 30 - 40 min or until tender, just beginning to brown at the edges.
  4. Allow it to cool a bit. Blend the roasted vegetables with corn and 1 cup stock/water. For a thinner soup increase the amount of liquid you use.
  5. Adjust salt and pepper as per taste. Add lime juice (add more or less of the lime juice depending on the sourness you'd like).
  6. Garnish with a few drops of olive oil, fennel fronds and sour cream. Serve warm.
This will be my entry to the "Healthy Inspirations event - soup" hosted by Usha.

MMC judge has spoken !!! Click here for the result.

Enjoy !!

Monday, August 31, 2009

Buckwheat Galette/ Buckwheat dosa

Galette, the recipe in today's blog may sound fancy but it is just another name for crepes. There are two forms of galette, one is the thick crusty variety and the other is a thin crepe like variety. I present here my version of the thin crepe like variety. I love dosa and crepes of any form. Any flour lying around the house becomes dosa batter for a quick meal at home. And buckwheat flour is no exception .....

The first time I had galette was in a small french cafe in NJ. The name and the description of the dish so reminded me of dosa (not to mention that it was one of the few vegetarian options in the menu) that I decided to try it. The dish was a big buckwheat crepe/dosa filled with sauteed spinach - needless to say, it was a wonderful, hearty meal and the inspiration for my recipe here.

A few quick ideas for the filling are:

Savory filling
Potato masala filling (Masala dosa version of galette?)
Spinach with ricotta or cream cheese filling
Mixed vegetable filling or Ratatouille

For the sweet version:
Any fruits with mascarpone cheese or caramelized bananas with ice cream would be wonderful. Chocolate filling - perfect!

With a bit of imagination there sure are a hundred possibilities.


After a long day's work I was in no mood to make the filling and then make the crepes. So I took the short cut !! I grated carrots, ginger and cilantro and mixed it right into the batter. I am sure any other vegetable and/or herbs would work just fine. Normally the galette recipe calls for eggs, but I didn't have any. So I substituted it with some oil and it works perfectly well. The whole process of mixing the batter can be done in a food processor. I normally grate all the vegetable in the food processor, then add the flour on top of this and continue with rest of the steps.

Ingredients:
1 cup buckwheat flour
1/2 cup all-purpose flour
1/2 cup buttermilk
1/4 cup olive oil or vegetable oil
1 to 1-1/2 cup water
salt to taste
finely grated carrots (optional)
finely chopped cilantro (optional)
2 tsp minced ginger (optional)

Method:
  1. Mix both the flour and salt.
  2. Now add any vegetable or herbs that you would like. (If you aren't going to add any, skip this step).
  3. Add the oil, buttermilk, mix well and slowly add water. Add just enough so that you get a thin pourable consistency (like a dosa batter or crepe batter).
  4. Heat a girdle or a crepe pan if you have one.
  5. Pour a ladle full of the batter and swirl the pan so you get nice circle with uniform thickness.
  6. Cook on medium heat for 2 min or so.
  7. Remove it from the pan when the galette looks brown underneath and the top portion looks cooked.
  8. You dont have to cook the other side but if you are not very sure if the top portion is cooked, you can flip it and cook the other side for 30 seconds or so.

Fill it with a filling of your choice or just roll it up even without it and serve with chutney and yogurt on the side.

This is a good dish to have for breakfast, lunch, dinner or anytime in between.

This will be my entry for WYF: Breaksfast event hosted by EC of Simple Indian Food blog.

Sunday, November 23, 2008

Basil Flavored Vegetable Pulao

Vegetable pulao is one of those dishes I have been making since my first experiments with cooking and the one I do not get bored with. Its a great dish to make for a quick meal or even for one of the big meal events such as a dinner party or a pot luck. So it was one of those days where I opened my fridge to see an assorted variety of vegetables staring at me. I decided to make pulao but didnt have mint to make my usual version. But then, my grind-and-freeze habit came to my rescue (whenever I have an excess of mint, cilantro or basil I try to grind it up and store the paste in freezer) - I had some ground basil in the freezer. Time for some improvisation !!! - I decided to give my pulao recipe an Italian twist, with basil instead of mint. As with such improvisations (the ones done under "duress" :)) - the basil pulao turned out to be quite flavorful and I sure plan to make this recipe more often.

A few things to note - basil flavor is pretty subtle here so make sure to limit the amount of garam masala as it can easily overpower the basil flavor. Soaking rice in salted water ensures that the grains remain separate and the rice doesnt turn mushy. Use a 1:1 measure of rice to water if you are going to soak the rice. You can always add more along the way. But if you do not have time to soak the rice, do go ahead and use the usual 1:2 (rice:water) or the measure you would normally use.

Ingredients

2 cups basmati rice
11/2 cups mixed vegetables (carrots, cauliflower, peas, beans, bell peppers etc)
2 medium onions, chopped

4 green chillies, chopped
3 cloves garlic, chopped

2 tsp finely chopped ginger
4 tbsp basil paste
2 tsp jeera

2 tsp fennel seeds
6 cloves
3 pods cardomam

2" stick cinnamon

2 bay leaves
2 tbsp oil

2 tsp garam masala powder(optional)
Fried cashews (optional)

Method

  1. Soak rice in generous amounts of salted cold water for 30 - 45 min. Then drain the rice and set it aside (this is optional, see above for more details).
  2. Heat oil in a pan, add all the ingredients from jeera to bay leaves. Saute until the mixture turns brown taking care not to burn the same.
  3. Now add the chopped onions, basil paste, green chillies, garlic and ginger and saute until onions turn golden brown.
  4. Add all the vegetables, sprinkle garam masala and saute for 5 min.
  5. Transfer the contents into a microwave safe bowl or the rice cooker, add rice, required amount of salt.
  6. Pour 2 cups of water and cook until the rice is done.
  7. Garnish with fried cashews and serve with raita.
This is my entry to Srivalli's "Rice Mela".
Enjoy!!

Tuesday, September 9, 2008

Cracked Wheat Idli

A recent addition to my cook book collection is Dakshin: Vegetarian Cuisine from South India by Chandra Padmanabhan. It has some really good pictures and I can't resist a cookbook with pretty pictures :-) This book has a wonderful collection of South Indian recipes, most of them traditional but a few that were very new to me. I hope to try them in the near future and post them soon in my blog. Idli is a staple in most Tamil (as in Tamilnadu) homes and Ms. Padmanabhan dedicates a whole section of the book to idlis! I have been eyeing rava (semolina) idli for a long time having come across quite a few in the blog world. So I decided to make rava idli for dinner from the recipe in the book except that I substituted rava with cracked wheat and tweaked the recipe to suit our taste. I love the taste and texture of cracked wheat - not to mention the whole lot of goodness packed in it. These idlis turned out to be very soft and yummy.... Guess this will be added on to my oft-repeated-recipe collection. Bulgur is a good substitute too and for people who are wondering isnt bulgur and cracked wheat the same, do read this very interesting article.

Ingredients:
11/2 cups cracked wheat
1/2 cup rava
1/2 tsp baking soda
2 green chillies, finely chopped
1 tsp chopped/ground ginger
5-6 cashews halved or quartered (optional)
2 tsp chana dal
1 tsp split urad dal
2 tsp jeera
2 tsp mustard
1/2 tsp asafoetida
few curry leaves
Salt to taste
1 tsp coarse ground pepper
3 cups buttermilk or more if required
2 tsp oil

Method:
  1. Mix cracked wheat, rava and soda together.
  2. Heat oil in a pan, add chana dal, urad dal, cashew, jeera and mustard. When they crackle add chillies, ginger, asafoetida and curry leaves.
  3. Remove from the stove and add this to the wheat/rava mixture.
  4. Add buttermilk, salt, pepper and mix well until a smooth batter is obtained. Consistency should be similar to idli batter.
  5. Grease idli plates and fill it with the batter. Steam for 10-15 min until a knife/toothpick inserted at the center of the idlis comes out clean.
I served the idlis with tomato korma though idili powder or chutney will work very well. I hope to post the recipe for tomato korma soon :-)

This will be my entry to Tasty Palettes "JFI - OCT '08 - Whole Grains".

And here is my first blog award presented by Easy Crafts of Simple Indian Food blog, yay :-) Thanks a lot Easy Crafts for the encouragement. I appreciate it. As per the rules of this award, you are to pass this award to at least 7 other blogs whose content/design you find brilliant. I am guilty of being a silent visitor sometime and I use this opportunity to let my blogger friends know how much I appreciate their work.

I present this award to:

Asha of Foodie's Hope
Manasi of A Cook at Heart

Srivalli of Cooking 4 all Seasons
Usha of
Veg Inspirations
Kitchen Flavours
Meeta of
Whats for Lunch Honey
Vaishali of
Holy Cow

Monday, August 25, 2008

Puliyodarai (Tamarind Rice) - I

So, after many months of salivating looking at all the different puliyodarai recipes/photos I have come across, I decided its time to turn the page... make some puliyodarai paste from scratch. Though many of them swear by MTR's puliyodarai powder I am not one of their greatest fans. Well, the reason for this is my friend V's mom, rather her awesome puliyodarai powder. She used to send us loads of this powder all the way from Mumbai and every time we had a pot luck our go to dish was puliyodarai made with this powder. It was such an easy dish to make and also an easy item to carry coz unlike the usual puliyodarai paste which oozes with oil, this was a powder which lasted the 10,000 mile trip and the green channel with no problems at all. Another major advantage was its long shelf life, it lasted in our freezer for almost an year or even longer. Needless to say this dish turned out to be the star of the show every time we made it. I keep telling V that her mom should patent this recipe, start a small scale business and I am sure it will turn out to be a super hit :-) I will probably be the first one to stock up on it !!!
Anyway, getting back to the present, I decided to take the conventional path and make the traditional puliyodarai paste. My recipe here is based on ideas I drew from two of my most trusted sources: My mom and Google. I improvised my mom's recipe added a few ingredients of my own (such as sugar) to make one that I think turned out to be a keeper. So here is my take on the traditional puliyodarai recipe. Depending on your taste and heat level you prefer, adjust the amount of tamarind concentrate and red chillies.


Ingredients:

2 tbsp chana dal

1 tbsp urad dal

2 tbsp dhaniya

1/2 tbsp seasme seeds

1 tbsp jeera

1/2 tbsp fenugreek

10-12 red chillies

11/2 tbsp tamarind concentrate

1 tsp turmeric

1 tsp sugar

salt to taste

Tempering:

1 tsp chana dal

1 tsp urad dal

2 tbsp peanuts

4-5 curry leaves

2 red chillies

1 tsp jeera

1 tsp mustard

1/2 tsp hing

1 tbsp oil

Method:

  1. Roast all the ingredients starting from chana dal to red chillies, individually and powder it together.
  2. Dissolve the tamarind concentrate in water.
  3. Heat oil in a large pan, add chana dal, urad dal, peanuts and when it is starting to brown add jeera, mustard, curry leaves, red chillies and hing.
  4. Now add tamarind, salt, sugar, turmeric and allow this to boil well.
  5. When the raw smell of tamarind disappears, add the prepared powder.
  6. Let this cook until the mixture thickens.
  7. Let cool and store it in a air-tight container.
Preparing the rice:
  1. Cook 2 cups of rice and spread it in a large bowl.
  2. Mix in 1-2 tsp oil, then add 2 tbsp of the prepared mixture.
  3. Adjust the amount of the mixture according to taste.
  4. Serve with vadaam/chips or just plain yogurt.
To store:
  • Store in a dry air-tight container.
  • This paste can be stored in the refrigerator for almost 2-3 weeks.
  • If the paste dries out add a couple of tsp of oil to the mixture.
This is my entry to "Long live the shelf" event hosted by Roma.

Help Needed: Srivalli of "Cooking 4 All Seasons" blog is doing a great job of raising funds for a noble cause. Please visit her site and help her help a person in need.