Showing posts with label MMC challenge. Show all posts

Tuesday, December 20, 2011

Gingerbread Cheesecake Bites

Here's the ingredient 11 of MMC challenge 

From the judge - " Congratulations on completing challenge 10. Looking forward to eating roasted Turnips. Your next ingredient, ingredient number 11 is your choice (you don't believe that do you!), Well.. its not your choice entirely. But the rules would make you believe you have a choice. I hope you like to eat Crystallized Ginger. How about some crunchy Vanilla Sugar Wafers or say tasting a spoon full of Molasses? Or the better, how about mixing them all.? I don't know about you, but I cannot imagine myself enjoying them as a mixture yet. So yep there it is, your challenge. But, then I promised that you have a choice. Yes, you do. Of the three ingredients you have to pick one of them as your main ingredient and the other two as add on. However remember that the flavors of all 3 ingredients should show up in the final product."


Three wonderful ingredient but have to choose one - this meant I had to weigh my choices wisely :-) The moment I saw the ingredients, I knew what my choice was going to be. I decided to focus on the gingery flavor ie. crystallized ginger mainly because the ginger flavor normally tends to overpower other subtle flavors. So in my opinion molasses and vanilla wafers didnt stand a chance when paired with the strong ginger flavor. This being Christmas season I thought making a gingerbread based sweet treat will be just the thing to do. Cheesecake has been in my to do list for a while now. But I did not have a springform pan that is normally used to bake cheesecake. So I decided to go the miniature version route. I used a 12-hole muffin pan to make these bite-sized cheesecake type dessert.

Notes:
These gingerbread bites are pretty heavy on the crust and light on the filling than you will find in the usual cheesecake. 
Add more or less crystallized ginger depending on how "gingery" you would like the filling to be. I used around 3-4 tbsp and found it to be a bit too much of ginger flavor to my liking. But if you can handle it feel free to use as much.
I have used a food processor to make the batter which I find is the easiest way - less dishes to clean later :-) But a hand mixer will do the job as well.

Ingredients
Gingersnap-vanilla wafer crust
10 gingersnaps
6 vanilla wafers
3 tbsp melted butter


Cheesecake Batter
1/4 cup cream cheese
1/2 cup mascarpone cheese
1/4 cup sour cream
1 large egg
1/2 cup molasses
1/8 tsp salt
2 tbsp crystallized ginger
1/4 tsp allspice powder
Cyrstallized ginger, Vanilla wafers or  Gingersnaps for garnish

Method

  1. Preheat the oven to 350F.
  2. Add the gingersnap and vanilla wafers into the food processor bowl fitted with the steel blade. Process until the mixture resembles fine grains of sand.
  3. Add the melted butter and pulse just until butter mixes in with the crumbs.
  4. Transfer to a bowl.
  5. Line a 12-hole muffin pan with the cupcake liners.
  6. Spoon 2 tablespoons of the crumb mixture into each hole of the prepared pan.
  7. Press into the bottoms and up just a bit to the sides of the liner. (The thickness of the crust can be varied as per your taste. My preference is a thicker crust and lighter on the filling.) Set aside.
  8. In a mixing bowl or in the food processor bowl beat cream cheese, mascarpone cheese and sour cream until light and fluffy (About 2-3 min if using a hand mixer). Dont worry if the consistency looks a bit runny.
  9. Add the egg, mix well till the egg is incorporated into the batter.
  10. Now add molasses, salt, crystallized ginger and allspice. Beat until well mixed. 
  11. Fill each of the crumb lined hole with a few tablespoons of the cheesecake batter.
  12. Bake for 15 min or just until the cheesecake batter is set.
  13. Let it cool and then refrigerate for a few hours or even overnight.
  14. Garnish with crystallized ginger and gingersnap before serving.

This will be my entry to the events "Yummy Desserts" hosted by Pranati and "Sinful Delights" hosted by Vardhini.

Enjoy!!

Wednesday, October 19, 2011

MMC Challenge Part 10 - Peanut Crusted Oven Roasted Turnips

 Here's the ingredient 10 of MMC challenge 
 
From the judge - "Congratulations on completing challenge 8 and 9. 
Your next ingredient, ingredient number 10 is one of the predominant exports of Gaul civilization and a very important part of Obelix's (as in Asterix and Obelix) diet.

                                 Turnip http://en.wikipedia.org/wiki/Turnip 

As you know Obelix is a very happy guy and likes to eat a lot, we expect your final product to do the same, provide a sumptuous recipe that pleases a guy with picky taste and a big stomach. :)"

M's request/order to make a sumptuous recipe using turnip proved to be harder than I had imagined. The usual traditional sambar, curry recipes were ruled out by him deeming it to be tasty but too ordinary.


When describing the flavor of turnip, its not uncommon to hear that turnip tastes like potatoes when cooked, though I would like to think it tastes pretty unique (in a good way!!). A skim through the world wide web for recipes suggests turnip is often cooked with or like potatoes (think soups, creamed turnip etc). So I decided to cook turnips the way I would potatoes. And roasting them like potatoes was what I did. Simple turnip roast with a bit of oil and spice would be amazing but it still would not qualify for the "out of the box" thinking required for the challenge. I tried to jazz up the texture and taste of the turnips by crusting them with some peanuts and flax meal. This brings an extra dimension to the taste and texture not to mention the exceptional nutritional value of both the peanuts and flax meal. It was a win-win all the way and am sure Obelix will be pleased as well to munch on the crunchy snack!!

Notes:
  1. The thinner the turnip slices, the crispier the end product. So cut the turnips according to the level of crispiness you would like. 
  2. Be generous with the crust. A lot of the crust will end up on the baking tray. The toasted crumbs do taste very yummy.
  3. Baking tips - Each oven behaves differently. So make sure you keep a  close eye on the dish after the 20 min mark. The longer it stays in the oven crispier it gets. So adjust the time according to your preference.

 Ingredients
1 medium sized turnip (peeled and cut into half moon slices, see notes)
2 tbsp Peanut or other oil
1 tbsp apple cider vinegar (sherry or balsamic can be used)
1 tbsp tamari or soy sauce
1 tsp honey
1/2 tsp red chili powder (cayenne or paprika can be substituted)
1/4 tsp salt
1/2 cup crushed roasted peanuts
1/2 cup Flax meal (or flax seeds coarsely ground)

Method
  1. Pre-heat the oven to 370 F.
  2. Line a baking sheet with aluminum foil.
  3. In a wide bowl mix all the ingredients except turnips until well mixed.
  4. Now dredge the turnips evenly with the above mixture. Make sure the trunip pieces are evenly and generously coated with the mixture. 
  5. Place the turnips on the prepared baking sheet.
  6. Do not over crowd the baking sheet and ensure the turnip pieces do not overlap. 
  7. Bake for 30 - 40 min and turn the pieces over mid way through the baking (around 12-15 min mark). 
  8. The roasting is done when the crust dries out and is golden brown in color and aromatic. 
  9. Serve as a side or a snack.
Enjoy !!

Saturday, April 23, 2011

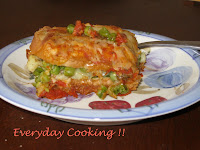
MMC Challenge 8 & 9 (Part 2) - Bread Lasagna (with potatoes and peas filling)

Here's the ingredient 8 & 9 of MMC challenge 

Ingredient 8: Green Peas
Ingredient 9: Standard White bread

This twist in the tale was M's way of getting me out of my writer's block as well as winter blues and inspire me to think outside the box. The rules he came up with are:

1. You have to use both ingredients 8 and 9 in making the dish. 
2. Both should be considered as main ingredients and hence should be provided with equal importance in quantity and in taste.
3. You have to make 2 dishes and that is why we are counting them as 2 ingredients.
4. The dishes should not be from the same category (Appetizer, Main course, Side, Dessert)

Here's part -2 of this challenge.


For the second part of this challenge, I decided to go with a twist on lasagna. Normally my instincts guide me into making an appetizer/snacks since I would eat an appetizer or a snack for a meal instead of the main course !! When I go to a restaurant I end up liking the options in the appetizer section more than I do the main course that I order appetizer as my main meal :-) So given my immense liking towards appetizers I had to resist the urge and decided to go with a main course.


This recipe is almost a fusion between lasagna and a sandwich. I have used the principle of lasagna (layering the bread with tomato sauce) but have used a stuffed sandwich instead of pasta for the layering. I like lasagna and potatoes/peas stuffed sandwich. So no surprise here that I loved the final result which had the taste and texture of both lasagna and a sandwich. Thinking about it, maybe I should rename this recipe as "Sandwich lasagna" :-)

Notes:
  1. Though it looks like the recipe involves too many steps and elaborate, this is actually nothing more than assembling a layer of sandwich with tomato sauce and cheese.
  2. If using fresh tomatoes instead of the Hunt's sauce, blanch the tomatoes. Remove the skin and seeds and puree.
  3. Season both the sauce and the stuffing generously. Taste and adjust the seasoning before assembling the lasagna. Remember there is enough bread in the recipe to absorb the spices. If under seasoned, the dish may turn out bland.
  4. Use a wide shallow pan to make the filling. The potatoes and peas will crisp up better if there are spread into as thin a layer as possible in the pan.
  5. Toasting the bread - Use either the oven or a simple toaster to toast the bread.

Ingredients
For the Sauce
Hunt's tomato sauce, plain - 14 oz  (see notes)
Diced tomatoes (fresh or canned) - 1 cup
Garlic - 2 cloves, minced
Sugar - 1 tsp
Red chili flakes - 1 tsp (or more)
Basil dry - 1/2 tsp
Salt and pepper to taste
Olive oil - 2 tbsp

Peas and potato stuffing
Potatoes , medium - 3, diced into small cubes
Peas, frozen thawed - 2 cups (remove excess moisture from the peas using a towel)
Black pepper, freshly ground  - 2 tsp or more
Salt to taste
Olive oil - 3 tbsp

White bread 6-8 slices
Oil or melted butter - as required
Garlic - 2 cloves
Mozzarella or Italian blend cheese - 2 cups (more or less as you'd like)

Method:
Sauce:
Heat oil in a sauce pan over medium heat.
Add red chili flakes and garlic. Let it cook for a minute.
Now add the diced tomatoes and season with salt.
Let it cook for 5 minutes, until the tomatoes are well cooked.
Now add the tomato sauce, sugar and basil. Let it boil for 10 min.
Add more salt if required and pepper. Taste and adjust seasoning.
Take it off the heat and set aside.

Filling:
Heat oil in a wide shallow pan.
Add potatoes and spread it into a single layer (so most of the potatoes are in direct contact with the pan).
Sprinkle some salt. Do not stir. Cover and let it cook for a few minutes until the bottom starts browning.
Now stir the potatoes, add peas. Let it cook until the potatoes are done and the peas get crisp.
Add more salt and pepper. Taste and adjust seasoning.
Remove from heat and set aside.

Preparing the bread:
If toasting in the oven, brush each side on the bread with oil or melted butter. Place the slices on a sheet pan, bake for 10 min at 400 F or just until the bread gets brown and toasty.
If using a toaster - toast the bread slices as you would and then brush with some oil or melted butter.
Rub both sides of the toasted bread with a garlic clove. Set aside.

Assembly: 
Pre-heat the oven to 375F.
Grease a baking dish with oil.
Spread a thin layer of the tomato mixture in the baking dish.
Layer a few bread slices (I used 31/2 slices) to cover the entire baking dish. Break the slices to make sure you fill the whole surface with bread.
Spread a little more than half of the potato/peas mixture on the bread layer. Spread 3/4 cup of cheese on this.
Cover this layer with another layer of bread.
Spread the remaining potato/peas layer and then the rest of the tomato mixture.
Sprinkle the remaining cheese on top, making sure to cover the entire baking pan.
Bake for 30-40 min or until the cheese melts and bubbly.
Remove it from the oven and let it cool a bit before slicing.
Serve with a side salad.

Enjoy !!

Tuesday, March 8, 2011

MMC Challenge 8 & 9 (Part 1) - Beer battered peas stuffed bread fritters (Pakora)

Here's the ingredient 8 & 9 of MMC challenge 

Ingredient 8: Green Peas
Ingredient 9: Standard White bread

This twist in the tale was M's way of getting me out of my writer's block as well as winter blues and inspire me to think outside the box. The rules he came up with are:

1. You have to use both ingredients 8 and 9 in making the dish. 
2. Both should be considered as main ingredients and hence should be provided with equal importance in quantity and in taste.
3. You have to make 2 dishes and that is why we are counting them as 2 ingredients.
4. The dishes should not be from the same category (Appetizer, Main course, Side, Dessert)

Here's part -1 of this challenge.

When I was thinking about good ideas for this challenge, inspiration came from the unlikliest of places - Bollywood movie !! We were watching Band Baaja Baarat (a very simple yet lovely film, btw) and there was a scene alluding to bread pakora. That made me go back in time and remember the first time I had this amazing snack - at my aunt's place. This dish is more like the south Indian Bhajji where a vegetable or in this case bread is dipped in a batter made of chickpea flour and deep fired.

I wanted to bring about my own twist to this dish and I was thinking what I would do to make it better suit my personal taste. A lot of time bhajjis or bread pakora can get heavy on the batter i.e the outer batter is so thick that the taste of the vegetable/bread fades into the background. And I for one do not like it when I cannot feel and taste the veggies/bread. So my idea was to make a batter that is crispy, airy and light - almost like a tempura batter. To achieve this I swapped the heavier chickpea flour for a lighter All-purpose flour/rice four combo and added beer instead of water. The frothy bubbly beer renders the batter light and airy. Thus was born beer battered bread pakora - melding the beer battering technique into a popular roadside snack in India.

To add to that I had to incorporate peas into this dish and what better way than to use it as a stuffing. It's almost like a sandwich, beer battered and fried. I think this was a win win all the way, given we love our sandwiches, our beer and deep fried snacks :-)

Notes:
  • White bread was the ingredient I was given, but feel free to substitute any other whole grain or multi-grain bread. 
  • Fresh peas can used in place of frozen ones when available. If using fresh peas, blanch the peas for a few minutes in boiling water before using it for the filling. 
  • The type of beer used will affect the taste of the batter. I used George Killians Irish red beer. 
  • For beer-haters - no worries about the beer smell in your fritters as most of the alcohol from the beer evaporates during cooking leaving only the good flavors behind.

Ingredients 
6 slices white bread (cut the crust off)
Vegetable oil, for frying
 
Stuffing
1 cup frozen green peas, thawed
3 green chillies (more or less as per taste and heat level of chillies used)
1 tsp minced ginger
2 cloves garlic minced
Salt & Pepper, to taste
2 tsp lemon juice

Batter

3/4 cup All-purpose flour
1/4 cup rice flour
2 cups beer
coarsely ground black pepper
salt

Method
Stuffing
  1. In a food processor grind chillies, garlic and ginger to a fine paste. 
  2. Add the peas, salt and pepper and pulse it a few times, until the peas are coarsely ground. 
  3. Now add the lemon juice, pulse it a couple more times. 
  4. Transfer it to a bowl. Set it aside.
Batter
  1. Whisk the two flours, salt and pepper in a bowl. 
  2. Add beer slowly 1 cup at a time. Whisk vigorously its well mixed.  Add just enough beer to get a fairly thin consistency. (Batter shouldnt be too runny or clump up on the bread.)
Fritters
  1. Heat oil in a deep frying pan. 
  2. Spread about 2-3 tbsp of the peas mixture onto a slice of bread. Cover it with another slice of bread.
    Press the corners well so the mixture is well sealed between the two slices. Cut into four pieces.
  3. Repeat with the remaining slices. Set aside on a plate.
  4. Whisk the batter once more to make sure there are no lumps and check for consistency.
  5. Dip each pieces of the stuffed bread in the batter. Shake off the excess batter. 
  6. Drop it carefully into the hot oil.
  7. Let it fry until its crispy and golden brown. Turn and fry the other side as well. 
  8. When both sides are golden, remove it onto a plate lined with some kitchen tissues to absorb the excess oil.
  9. Serve warm with ketchup or mint chutney.
Enjoy !!

Sunday, December 5, 2010

MMC Challenge 7 - Curry Flavored Corn Cakes

Here's the ingredient 7 of MMC challenge - Curry Leaves. This post is long overdue now and finally looks like its time to move it from "draft" folder to "published" :-) When M gave me this ingredient he was very particular that it should not be chutney, sambar or other such traditional recipe. He wanted me to think out side the box and so I did. I am not sure if I succeeded totally but I do think its a fusion kind of a recipe. I let you guys decide which genre this recipe can be categorized as.


Corn cakes are a form of corn bread, a shallow fried version. Its also sometimes called "hoe cakes" or "jonny cakes". Its almost like corn cakes or to compare it to something Indian - its almost like akki roti (Kannadiga dish made of rice flour). This Southern (as in the American South) dish gets an Indian flavor with the addition of curry leaves. While eating the corn cakes I couldnt help but be reminded of vadai. Whatever be the name it sure was delicious and it was a perfect accompaniment to the stew we had on a cold October evening. It doubles up as a wonderful evening snack or appetizer with a dip/sour cream/ketchup.

Ingredients


1/2 cup c
orn meal
1/4 cup rice flour
2 tsp green chili paste (2-4 green chilies)
1 tsp minced garlic
1/4 cup frozen (and thawed) or fresh corn
1/4 cup curry leaves
1 small red onion
A pinch of baking soda
Salt to taste
2-3 tbsp feta cheese (or any mexican cheese) - optional

Method

  1. Grind curry leaves in food processor. Add onion, green chili paste and garlic. Pulse it a few times.
  2. Now add corn flour, rice flour, baking soda and salt. Pulse a few times just until the ingredients are mixed.
  3. Remove the mixture in to a bowl. Add corn and cheese (if using). Adjust seasoning.
  4. Heat 2-3 tbsp oil in a skillet. Make sure the oil coats the surface of the skillet.
  5. Drop lemon sized ball of the mixture into the hot oil. Flatten it (thickness should be that of a pancake).
  6. Cook under medium flame and let it brown.
  7. Flip to cook the other side. Remove when both sides are brown.
  8. Serve warm.
Enjoy !!

Thursday, July 8, 2010

MMC Ingredient 6 - Drumstick/Murungaikai/Moringa Pods

Looks like I am back - though with a busy summer and travel, I can never be too sure :-) Here's the latest MMC challenge.

MMC Ingredient 6 is Murungaikai (Moringa Pods).


Murungaikai is readily available in South India and both the vegetable and the leaves are used in cooking. Most common way to use murungaikai is in sambar, along with small onions. Leaves can be used in poriyal or subji with a bit of dal and spiced with chilies and coconut. I never realized how much I'd miss murungaikai until I came to the US and couldn't find any fresh ones worth its name in the store. For those of you who have no clue what am talking about, take a look at this wiki entry for Moringa/murungaikai.

I personally think this ingredient is one of the more challenging ones since as far as I know, I have seen murungaikai used only in South India. My mom uses murungaikai but it is restricted to sambar for the most part, especially the Sunday special lunch which usually consisted of murungaikai/small onion sambar, potato curry and vadam/papad. Given the limited usage of murungaikai I have come across, I had to squeeze my brains a bit harder to make something that's interesting and not a sambar !!

I did finally come up with not one but two dishes. I was unable to choose between the two and hence I give you both my creations. The first dish is a pickle which is very easy to make but needs a bit of patience - it has to marinate for 2-4 days for best results. The other dish is a salad, an apt summer dish. It does not involve much cooking and is pretty easy to put together.

Notes:

  1. I used frozen murungaikai which is readily available in Indian stores. Fresh ones can be used as well and am sure they'll taste much better.
  2. Cook murungaikai until soft and splits open readily but should still hold its shape and not be mushy.
  3. The edible part of murungaikai is the seeds and the pulp. Split open murungaikai and scoop out the pulp and seeds to eat.
  4. Roasted fenugreek powder: Dry roast a 2 tsp of fenugreek in a pan until its brown and aromatic. Let cool, grind to a smooth powder. Store the excess powder in the refrigerator.

Murungaikai Urugai (Moringa Pod Pickle)

Ingredients
11/2 cup drumstick (murungakai)
1/4 cup carrots, blanched, 1/2" sticks (optional, see notes)
2 green chilies, split open
1/2 tsp turmeric
1/2 tsp roasted fenugreek powder (see notes)
2 tsp red chili powder
1/2 tsp mustard
1/4 cup sesame oil
2 tbsp canola oil
salt to taste

Method
  1. Boil water in a large pot. Add enough salt.
  2. Drop the frozen murungaikai in boiling water and let it cook (for about 15-20 min). After 15 min check for "done"ness. If using fresh ones, cooking time may vary.
  3. Blanch carrots similarly in boiling water. Cook for 10 min or so. Check for doneness. Cook just to take the raw edge off. Carrots should still remain crisp.
  4. Drain and pat dry carrots and murungaikai pieces.
  5. In a saute pan, heat canola oil. When its hot, add mustard seed. Let it splutter.
  6. Remove from heat. Now add turmeric, chili powder, green chilies.
  7. Stir once. Now add the cooked murungaikai and carrot pieces. Add fenugreek powder. Stir.
  8. Add salt and the seasme seed oil. Mix well. Taste and adjust seasoning.
  9. Transfer it to a dry container (glass bottle is preferable). Close tight and let it stand for a day at room temperature.
  10. On the 2nd day, move it to the refrigerator. Let it stand for a day or two longer.
  11. You can use it as early as the 3rd day but as with any pickle the longer it stands the better it tastes.
  12. Pickle can be stored in the refrigerator for at least 2 weeks.

Murungaikai (Moringa Pod) Salad

Ingredients
16 oz frozen drumstick/murungaikai
2 tbsp finely chopped red onion
2 tbsp finely chopped tomatoes (seeded)
1-2 small green chili, finely chopped
1 tsp dessicated or frozen coconut (optional)
2-3 tsp lime juice
1 tsp olive/vegetable oil
1/2 tsp mustard seeds
4 curry leaves, coarsely chopped
Salt to taste

Method
  1. Cook murungaikai as done for the pickles (step 2 of murungaikai pickle).
  2. Split open the murungaikai pieces. Scoop out the pulp and seeds. Set aside.
  3. In a salad bowl mix onions, tomatoes and green chilies. Mix well. Now add murungaikai pulp. Mix lightly.
  4. In a small saute pan, heat oil. Add mustard seeds. Let it splutter. Add the curry leaves.
  5. Add this to the veggie mixture. Season with salt.
  6. Add lime juice and coconut.
  7. Mix well.

Enjoy !!

Sunday, May 2, 2010

MMC Ingredient 3 Beets - Verdict

Here's "M"s review on MMC ingredient -3, Beets.
----------------------------------------------------------------------------
Hello Everyone,
First of all, I apologize for not able to get back with reviews for the last 3 MMC challenge recipes.
Shopping Experience:
Finally I was able to get my hands at trying Rajee’s Beets soufflé last weekend. Just reading the recipe and looking at the words ramekins, baking etc did make me less enthusiastic about trying this one out.
In terms of shopping for ingredients, well I guess it wasn’t that difficult to find most of the ingredients except for ramekins. With Rajee’s help I was able to find that, and finally got ready to try the recipe out.
The Cooking Experience:
The authentic side in me wanted to try this recipe with fresh beets, rather than canned ones. It didn’t take much time to peel the beetroot off and cook it. I would say may be around 20 minutes in all. Putting the remaining things together to get the final mixture took another 10 minutes. However, I did make one change to this recipe; I did not want to use eggs. Hence Rajee suggested using flax meal instead.
The Verdict:
Now coming to the end product, it took seriously a long amount of time to get the baking done. I am not sure whether it is because of my oven or the flax meal, but it took me around 90 minutes to get to the point which Rajee mentioned in her blog.
The soufflé texture for me was very odd; again it could be because of the lack of eggs. But that didn’t stop my friends from licking it out clean. And I am not very sure about the taste of beet in the soufflé as well. Here are my final scores for this challenge. With respect to ease of cooking, the dish was fairly simple to make, and hence I can give 6 out of 6 for that. Regarding the health factor, well I used fat free cream cheese and for a dessert this dish is quite healthy and hence 4 out of 4. For uniqueness, well making a soufflé with beets in itself is good enough to earn full points and hence 2 out of 2. And last, regarding the taste, well taking into consideration the change I made (absence of eggs) and oven fluctuations, I would like to give a 5 out of 8 for this recipe.
I guess the final score then is 6+4+2+5 = 17/20.
Conclusion:
Will meet you again at Rajee’s blog with the next MMC review. Thank you.

Wednesday, April 28, 2010

MMC Ingredient 5 - Dates, Jaggery, Coffee

MMC ingredient(s) 5:

Here's what "M" had to say about it
For a change, this challenge will be different. You will be getting 3 ingredients and you have to use them all. It is not necessary that you use them in equal proportions. But the end thumb rule is, for a person who eats the final product, he/she should be able to identify all the 3 ingredients on his/her own.

The ingredients are Dates, Jaggery,
Coffee (ground).

Here's what I made for this challenge.

Dates Crepe with Pear-dates Compote and Coffee Cream Sauce

When I think of dates, the recipe I almost involuntarily think of is dates chutney aka the sweet chutney we get for chaats. If the challenge ingredients were just dates and jaggery I would have surely opted for the chutney. But the moment I laid eyes on the third ingredient: coffee, I knew my recipe was going to be a dessert or a breakfast. I can safely say that the meal I enjoy the most in a day is breakfast, be it the simple toast/jelly or an elaborate weekend spread. And ofcourse always with a cuppa java, unadulterated (i.e no cream, no sugar !!)

I wanted to make sure I maintain the individuality of each of the ingredients yet make sure they complement each other well. Coffee has one of the stronger flavors and I kept it distinct by using it in the sauce. I used dates and jaggery in both the crepe and the pear compote to sweeten the dish. Though the ingredient list and the method looks a bit long, its actually quite simple. If the pear compote and coffee sauce are made ahead of time its just a matter of whipping up the crepe batter. This dish is a pretty delicious and sweet treat. Or if you would like it as a breakfast serve it with scrambled eggs or poached eggs on the side. Now that Mother's day is just around the corner, I think this will be a great dish for a Mother's day brunch !!

Notes:

  1. Jaggery water: Most of the times I find that jaggery is contaminated with dirt. Dissolve 1/4 cup jaggery in 1/4 cup water. Boil until jaggery dissolves. Filter to remove dirt. Reserve 2 tbsp of this if using it for the compote.
  2. The amount of jaggery listed here makes this dish a pretty sweet one. So adjust the jaggery according to the sweetness you'd like.
  3. I use food processor to make the crepe batter. But mixing it buy hand works just fine as well.
  4. For the coffee sauce I use instant coffee dissolved in just enough hot water. Freshly brewed coffee can also be used. Adjust the strength according to taste.
  5. I had pears on hand, so used it for the compote but feel free to use any fruit that you like.
  6. Both coffee sauce and pear compote can be made ahead of time and refrigerated. Though warm before serving.
Ingredients
Crepes:
8 dates (pitted)
1/4 cup jaggery water (reserve 2 tbsp for the pear compote, if using)
1 egg
1/2 cup unbleached all-purpose flour
1/2 - 3/4 cup milk
1 tbsp melted butter
Salt, a pinch

Pear Compote:
1 pear, diced (ripe but firm)
1/4 cup dates (pitted, coarsely chopped)
2 tbsp jaggery water (optional)
1 tsp lemon

Coffee Sauce:
1 tbsp butter
1/4 cup semi-sweet chocolate chips
sugar (optional)
1 tbsp instant coffee (see notes)
1/4 cup heavy cream

Method
Crepes:
  1. Boil dates with jaggery water for a few minutes - just until dates get tender.
  2. Let it cool. Grind to a smooth paste. Set aside.
  3. Mix flour and salt. Set aside
  4. In a food processor combine eggs and dates paste. Pulse for a few seconds.
  5. Add the flour and keep the processor on.
  6. Slowly pour milk starting with 1/4 cup and keep adding until the flour is incorporated and the batter is of a pouring consistency.
  7. Finally add melted butter and transfer it to a bowl.
  8. Heat a griddle or a crepe pan. Brush with a bit of melted butter.
  9. Pour a ladle full of the batter. Swirl the pan to make thin circle of even thickness.
  10. Cook for a few minutes, until the bottom browns. Flip, cook for a few seconds.
  11. Fold and transfer onto a plate.
Pear Compote:
  1. In a saute pan, combine pear, dates and jaggery water if using.
  2. Saute for a few minutes just until the pear gets tender and all the ingredients are well combined.
  3. Remove from heat, add lemon juice. Stir. Set aside.
Coffee Sauce:
  1. Combine all the ingredients under coffee sauce in a pot.
  2. Heat until all the ingredients mix well and the sauce gets a smooth consistency.
  3. Remove from heat. Set aside.
Assembly:
  1. Place 2 crepes on a plate.
  2. Scoop a spoonful or two of the pear compote onto the crepe.
  3. Drizzle with coffee sauce and serve.
This will be my entry to Panch Pakwan's Mother's day event.

Enjoy !!

Tuesday, March 9, 2010

MMC Ingredient 4 - Popcorn

MMC ingredient 4 is Popcorn and here's what I made:

Popcorn Crusted Vegetable Lollipop

When "M' announced that the 4th ingredient is popcorn, I wasn't sure how exactly I was going to incorporate it in my recipe. The first thought that popped into my mind was making a simple trail mix with popcorn and some nuts. But the MMC challenge does not have a category for snacks and obviously trail mix cannot pass off as either an appetizer or a side. As healthful as a trail mix maybe I didn't think it was innovative enough for this challenge. When I was thinking hard for some ideas, I realized that popcorn can have the same use as bread crumbs if I can grind it to a coarse powder. This opened a big wide door for I am sure we can think of hundred places where bread crumbs can be used, be it the good old Mac 'n' Cheese or breaded vegetables.

I was shooting for a side dish and I thought breaded veggies like breaded & fried green beans or a tempura style vegetable will be lovely. I wanted to use the freshest of ingredients but unfortunately didn't have any fresh veggies in the fridge. All I had was potatoes, some left over carrots and a bell peppers. I tried to make something fancy or atleast something that can have a fancy name but yet have the most simple ingredients that anyone can lay their hands on at anytime. Also my husband loves the veggie cutlet that we get in Indian restaurant. So I decided to go ahead and make veggie cutlets with a popcorn crust instead of the usual flour or a bread crumb crust. With a few toothpicks these cutlets can be converted into lollipops which are a great finger food for your next party. For people who have tasted vadam esp one that is made of Poha/aval, this popcorn crust gives a similar taste to vadam.

Note:
  1. This dish is a good way to use left over popcorn after a Saturday movie night if you do have any such thing as left-over popcorn :-).
  2. For the popcorn, I used Orville Redenbacher's smart pop. Pop the corn in the microwave as per package directions. But you sure can use any kind that you have on hand.
  3. I used my trusted food processor to grind the popcorn to a coarse powder.
  4. You can use any kind of veggies, fresh/frozen.
  5. I love Maggi chatpata tomato sauce. It gives a very faint chinese flavor to the cooking. But if feel free to use any kind of tomato sauce/ketchup you have on hand.
  6. Now to the crust: Popcorn crumbs tend to fall off the cutlet pretty easily. So make sure you press the crust to make it stick to the cutlet.
  7. I have used diluted buttermilk to aid the sticking.
  8. Shallow Frying: Crust tends to fall off a bit into the oil, so you will have brunt crumbs floating in the oil. I generally shallow fry not more than 3-4 cutlets at a time. I use just enough oil to coat the cutlets and no more. This way, I get to control both the amount of oil used as well as clean the pan after every batch so you don't have burnt crumbs sticking to your cutlets.
  9. Fry the cutlets on a medium low flame, be patient as high heat will burn the popcorn coating.
  10. You can make the vegetable mixture ahead of time and refrigerate it for a day or so or freeze it for upto a month.
  11. Baking is a good option though I haven't tried it this time.
  12. Presentation: I made my cutlets a bit bigger for the toothpick that I had. So try to size the cutlet according to the toothpick you have or if you don't care you can completely avoid the toothpick.
Ingredients:
1/4 cup minced onions
1 tsp minced garlic
1 tsp minced ginger
1 tsp finely chopped jalapeno or Serrano peppers
1/4 cup finely chopped bell pepper
1/4 cup finely chopped or shredded carrots
1 cup boiled, mashed potatoes
1 tsp cayenne or red chili powder
1 tbsp tomato ketchup (Maggie chatpata tomato Sauce)
1/2 cup popcorn (popped)
2 tbsp oil and more for shallow frying
salt for seasoning

For crust:
1 cup popcorn (popped)
2 tbsp Parmesan cheese
1 tsp chopped cilantro
salt/black pepper, for seasoning
2 tbsp buttermilk, diluted with 4 tbsp water

For stuffing:
2 tbsp cream cheese
1/2 tsp cilantro finely chopped
Salt/Black pepper, for seasoning

Method
  1. For crust: Grind popcorn to a coarse powder in a food processor or a spice blender.
  2. In a wide bowl, mix popcorn powder, cheese and cilantro. Add salt and black pepper. Taste and adjust the seasoning. Set aside.
  3. Stuffing: In a small bowl, mix cream cheese and cilantro. Add salt, taste and adjust the seasoning. Keep this refrigerated until its ready to use.
  4. In another bowl dilute 2 tbsp buttermilk with 4 tbsp water. Set aside.
  5. Heat 2 tbsp oil in a saute pan. Add ginger, garlic, jalapeno peppers and onions. Saute it for a few minutes until onions become translucent. Now add shredded carrots and bell peppers. Saute it for a few more minutes until the veggies get tender. Add mashed potatoes, red chili powder, ketchup.
  6. Stir over a low flame for a few minutes. Add salt, taste and adjust seasoning.
  7. Switch off the heat and transfer this into another bowl. Let it cool. Add the popcorn powder and cilantro into this mixture and mix gently.
  8. Shape the mixture into small round balls (size of a small baby potato or even smaller).
  9. Stuff each ball with a pea sized cream cheese stuffing, flatten the balls into a patty or any other shape that you'd like.
  10. Before frying: Take a cutlet, dunk it in the buttermilk mixture. Shake off excess buttermilk. Now roll it in the popcorn mixture. Press the popcorn so it adheres well to the cutlet. Shake off the excess crumbs. Repeat this with the rest of the patties.
  11. In a saute pan heat 2 tbsp oil on low-medium flame. Shallow fry the prepared cutlet 2-4 at a time until its light brown in color. Turn over to the other side and fry until it browns.
  12. Place it on a paper towel to absorb excess oil. Pierce one or two tooth picks into the cutlet, arrange it on a plate and serve with tomato ketchup or cilantro chutney.
This will be my entry to Sunday Snacks - Healthy Snacks event hosted by Divya of Dil se.

Enjoy !!

Thursday, March 4, 2010

MMC Ingredient 3 - Beets

MMC challenge 3:

Beets Souffle with Cashew Nut Topping

When "M" gave me the challenge ingredient, Beets, I didnt have a brain wave immediately though I had a few ideas ranging from appetizer to dessert, traditional Indian dishes to out of the blue dessert dishes. One main challenge with beets is that fresh beets takes a long time to cook. Except for pressure cooking, everything else be it roasting or boiling on the stove top takes minimum of 40 min. Given that I had only 1 hour to prepare the dish, I had to think of something which fits the time constraint. But since I was allowed to use canned beets, I took that route and saved some time. Also, the last time I had made pearl onion sambar, M said he knew I'd make that. Obviously I wasnt too happy that I was so predictable :-) Hence I really had to think hard to make sure I was as innovative as possible.

This week it was my husband's B'day and as is our tradition I wanted to make some dessert. I thought why not use beets for the dessert I was going to make. My first choice was the Southern classic "Red velvet cake". I was looking for the recipe but nothing suited my taste as the "traditional" red velvet cake contains loads of red food coloring and not beets. After some more search there were red velvet cakes with beets which looked pretty promising. But the problem with cakes is that it is not the best of dessert to make when its just two people sharing it. I am sure my husband wasn't going to complain about eating it all but I do have to consider the health factor what with all the butter, sugar and the frosting.

Now that cake was off the list, I had to think of some other dessert that was easy to make, took just an hour to prepare and could be made in smaller portions. I've been meaning to make souffle for a long time now and so almost on a whim I decided to make beet souffle. I did some browsing to look for souffle recipes with beets and to my joy found it wasnt very popular or made often as I could not find too many hits in my short search !!

I found the basic technique and recipes for carrot souffle, modified it so I can include beets and other ingredients like cream cheese and cashews that I love. Also, to make things easy and less time consuming I have skipped the steps involving separating the egg whites, whipping it for a long time etc. I was a bit skeptical about this initially but the end product put my doubts to rest. Maybe just some day I might give the traditional method a try but till then this recipe will do...

Here is Beet Souffle my Way.......

Note:
  1. Fresh beets can be used as well, though cook it before pureeing. If using canned beets, make sure it contains just beets and water and no salt or flavoring.
  2. Different ovens behave differently and if you have one like I do, it has its own mind. When I made these souffle, my oven refused to cooperate and didnt go beyond 325F. Hence I had to bake mine for almost 40 min. But if you have a well-behaved oven, then 30 min should be enough. But keep a close eye on it after 20 min.
  3. This souffle is a bit more dense than other souffles. Souffle does rise above the rim of the ramekins, but it deflates within a few minutes after you take it out of the oven. If you want the big "ta da" finish, I suggest baking it just before you serve. If like me you dont care for the appearance, then by all means bake it whenever you like. But I'd suggest serving it warm.
  4. Depending on the serving size you would like use appropriate sized ramekins. This recipe doubles or halves very well. I fact I have halved this recipe to give just two portions. Feel free to experiment.

Ingredients
1/2 stick butter, melted
1 lbs cooked beets (or canned)
1/2 cup flour
1/2 cup sugar
1/4 cup cream cheese (at room temp)
1/2 tsp baking powder
2 eggs
1 tsp minced ginger, fresh (or ginger powder)

Topping:
2 tbsp cashew (chopped into small pieces)
1 tbsp sugar
1/2 tbsp melted butter

Method
  1. Pre-heat the oven to 350F. Grease 4 to 6 ramekins with butter (only to three quarters of the height of the ramekins) and coat it with some sugar.
  2. For topping: Mix all the ingredients for the topping. Set aside.
  3. Transfer beets, sugar, baking powder, flour, cream cheese and ginger onto a food processor. Beat until beets are mashed. Add melted butter. Now add eggs and run it for 30 sec or so.
  4. Pour this mixture onto the greased ramekins. Do not fill the ramekins to the top just until its 3/4th full. This will give some space for the souffle to rise.
  5. Sprinkle with topping mixture.
  6. Bake at 350 for 25 - 30 min or until a toothpick inserted at the center comes out clean.
  7. Serve warm.

Enjoy !!

MMC Ingredient 2 Pearl Onion - Verdict

Here's "M"s verdict on pearl onion sambar... He sure is one strict judge with a very sensitive palate :-)
--------------------------------------------------------

Hello everyone,


You are reading the Me Myself and Chef Challenge review number 2.


The ingredient as you know already is Pearl onions. Just like the last review, I will start this review with my experience identifying and buying the necessary ingredients. Then talk about making the recipe and then end it with the final opinion on this dish.


The Shopping Experience:

Well, on identifying and buying the ingredients, there wasn’t anything specific that I have to buy except for the onions and a few spices. And as most of the spices and other ingredients are common ones used in Indian food, I didn’t have much of a problem in identifying them as well.


The Cooking Experience:

Regarding the cooking, I would say it was a bit tedious. It took me pretty much the entire hour to make this dish. As I have never tried boiling the lentils and onions together, I thought I will try that option. And surprisingly, the end result was the lentils were well cooked but the onions though cooked were still in whole pieces, which of course was fine with me. I toned down the amount of coriander seeds. I also used only half of cinnamon and cloves amount mentioned as I am not a big fan of both of them in Sambhar.


The Verdict:

And finally my overall opinion of the dish, I liked it. As Rajee took the traditional route this time, and made a dish of which I have tasted some form or other earlier, I didn’t expect me not to like the dish. Regarding the taste of this dish, I would give it a 6 out of 8. The onions tasted good in the sambhar. Though I used less amounts of cinnamon and cloves, they still overpowered all other ingredients in the sambhar. But as Rajee said those are the ingredients which actually make this dish different from other varieties, I am not going to complain here. Regarding ease of cooking, well not as easy as making the fennel carrot soup ! I would say 5 out of 6. Regarding health aspects of the dish, just like the last dish, there is pretty much nothing about this dish that is unhealthy. Hence 4 off 4. Regarding uniqueness factor, technically the uniqueness factor on method of cooking/eating is nothing new, however, Rajee gave us a fantastic sentimental story behind this dish, and hence whole 2 points for that.


So its 6 + 5 + 4 + 2 = 17/20.


Conclusion:

Thanks for reading this review so far. Will meet you all at Rajee’s blog next time with Review 3. Thank you.

Wednesday, February 24, 2010

MMC Ingredient 2 - Pearl Onion

The second MMC challenge is:

Sunday Lunch from Mom's Kitchen:
Pearl Onion Sambar/Chinni vengaya Sambar/ Chummna Kandhecha Sambar


For the 2nd week of our MMC challenge, M brought a twist to the story. He gave me a choice of 3 ingredients out of which I had to pick one and give my reasons for choosing it. The three ingredients are:

1. Pearl Onion
2. Dates
3 Orange Juice

As soon as I heard the choices, I thought I knew right away what I was going to choose - Pearl Onions. I wanted to share with you all one of my mom's signature dishes - Sambar with Pearl Onions. But just a few minutes later, I could hear the Dates calling my name :-) I always wanted to use Dates other than in sweet chutney that we use for Chaat. So I thought this challenge is a good platform to use Dates in a innovative way. But the nostalgia & "Mom sentiment" won over innovation and I decided to go ahead and choose Pearl onion. So I am hoping "Mom senti" will sway the judge as well as it did me :-)

When I was young, this sambar was our Sunday special lunch with Aloo subji or with idlis for the Diwali eve dinner that my mom makes. Pearl onions also known as "Madras Onions" are widely available in Madras where I grew up. These tiny ones have a very different taste, much less pungent and sweeter than their larger counterpart. But the main problem with these is peeling them. Though these onions dont bring as much tears to your eyes like the bigger ones, they still are pretty potent and added to this was the miniature size that makes it hard to peel. So before we actually got to enjoy the dish we had to go through the grueling work of peeling the onions.

Preparing the onions prior to cooking was a big chore; obviously those were the days before the comfort of frozen or ready to cook vegetables was readily available. My dad used to soak it in cold water to remove the dirt/mud and then all us kids had to sit down and help him peel. Wet onions, sticky peel - not a good combination; I used to hate this chore. But.. oh so in love was I with the dish that I didnt mind all the trouble. Me being the enforcer of gender equality in the household, I would fight really hard with my brothers accusing them of not doing the chore but getting to enjoy the reward alone. As any of you who grew up with brothers might know, Sunday morning will invariably have a few different cricket matches that my brothers had to run too. So it was pretty convenient for them that they'd be out the whole morning and show up just in time for the sumptuous lunch. I used to get so angry at them then but thinking of it now brings a smile to my face thinking of all that silliness :-)

So here's the Sambar with Pearl Onion the way my mom makes but in my kitchen. My mom never gives me exact measurement for any recipe coz as most mom's, she herself doesnt use any standard measurement. Its always a handful of this or a handful of that. So I have tried a few different version and have standardized it to our taste.

Note:
  1. I like the taste of Dhaniya/coriander. So I have been a bit liberal with it.
  2. I have used frozen red pearl onions (thawed in the microwave for a few min). You can use fresh ones as well if available.
  3. The speciality of this dish is the inclusion of cloves and cinnamon bark. These two spices sets this recipe apart from the Tamilian/Keralite "arachivitta sambar" (Sambar with ground coconut based masala).
  4. I love my pressure cooker for cooking dal as it saves me lotsa time. If you dont have a pressure cooker, boil the dal with or without onions for 20 to 30 minutes until well cooked. Soaking the toor dal in warm water for 1/2 hr prior to cooking it will help quicken the cooking process.
  5. My husband does not share my love for the pearl onions the way I do. He is not too keen the whole pearl onions but loves the flavor when they are cooked into the dal. So I normally pressure cook the onions with dal. But if you want to retain the wholeness of the onions, I would suggest sauteing it with the mustard and jeera (step 3), wait until it gets tender before adding tamarind water.
  6. I find it easy to use tamarind concentrate. But if you have tamarind, soak it in water and extract the pulp. Use 1/4 cup thick pulp in place of 1 tbsp tamarind concentrate. Depending on the sourness you'd like, adjust the amount of tamarind in the recipe. I normally go easy on the tamarind.
  7. Masala can be made ahead of time. Can be refrigerated for a couple of days or may be frozen for almost a month.
Ingredients
12 oz red pearl onions (white ones are fine as well. Save a few to be blended with the masala)
3/4 cup toor dal
1 cup water
1 to 11/4 tbsp tamarind concentrate (dissolve it in 1/4 cup water)
1 tsp turmeric
A few pinches of asafoetida
Salt to taste

Masala -
1/2 cup dhaniya (coriander seeds)
2 tbsp chana dal
2 tsp Jeera (cumin seeds)
1/2 tsp methi seeds (Fenugreek)
1 inch stick cinnamon bark
6 cloves
5-6 red chillies
1/4 cup coconut (dessicated, fresh or frozen)
3-4 nos. pearl onions
1/4 cup water (or as needed)

Tadka
2 tbsp oil
2 tsp chana dal
2 red chillies
1 tsp Jeera (cumin)
1 tsp mustard seeds
4-5 curry leaves

Method
  1. For masala: Dry roast each ingredient given under Masala (except water, obviously) until they turn light brown and aromatic. Let it cool. Grind into a smooth paste with water. Set aside.
  2. Pressure cook the dal and onions with one cup water, a pinch of turmeric and a few drops of oil. I normally allow 3-4 whistle and this works best for my cooker. Turn off the heat and let the pressure release naturally.
  3. In a medium sized pot, heat oil and add all the ingredient for tadka starting with the dals. Let the mustard and curry leaves splutter.
  4. Now add the tamarind concentrate dissolved in water. Add turmeric and asafoetida. Allow this to boil until the raw smell of tamarind disappears. (5 min or so)
  5. Now add the cooked dal and the ground masala. Add more water only if necessary. Stir frequently.
  6. Adjust seasoning, simmer for another 5 min to 10 min, until the masala gets cooked.
  7. Garnish with a few drops of sesame oil. Serve with hot rice. Goes well with Idlis or Dosas too.
Enjoy !!

Sunday, February 21, 2010

MMC Ingredient 1 Fennel - Verdict

Here’s the review of Carrot-Fennel Soup by Muthu

As promised, here's the judge's final word on the soup. "M' has been gracious enough to share with us all his experience right from shopping for the ingredients to the final score. And it sure is an interesting read as well.

Note: I will post the audio of this final verdict in "M's" own words very soon....As soon as I figure out how to upload audio files on blogger...

-------------------------------------------------------------------------------
Hello everyone,

Before going further, I would like to congratulate rajee on participating in this innovative challenge and I hope this challenge in some way or other nudges her a bit towards some of her goals.
As you all know the details of this challenge that rajee is participating, I am goin to skip the introduction and get into details. In this clip you will be listening to my experience trying rajee fennel and carrot soup recipe, which she has posted in her blog last week.

The Shopping Experience:
First I will talk a bit about what I experienced while shopping for the ingredients for this fennel and carrot soup, followed by which I will talk a bit about my experience with cooking this soup and end it with my final opinion on this dish.
I initially thought of recording the story as and when I do it, but then that proved to be cumbersome. When I talked to my voice recorder holding it my hand at whole foods aisles, I did get more than a couple of weird stares from some grandmas around me. So I had to stop it.
As one of the rules of this competition is that the ingredients used in this recipe should be commonly available. When I went around whole foods buying it, I was able to find all the ingredients very easily except for fennel. Though it was me who suggested the ingredient at first place to rajee, I have no idea who it looked like and I even donno which section of groceries I had to look into for a fennel.
After some search, I finally found it in freezer along with spinach. I did make sure that it is fennel when I was billing it. I ended up buying dried thyme as I don’t want to go around whole foods figuring out where fresh thyme would be.

The Cooking Experience:
Regarding cooking, it took me less than an hour to get this dish made and with less effort. The majority of effort went on cutting vegetables which ofcourse was not much. It took around 40 minutes to get the fennel decently soft enough in the oven. I did not use corn and I think I am happy that I didn’t use. I used just water as the soup base and not vegetable stock and that worked fine as well.
And regarding the final dish, well it tasted really good, though a bit too healthy for me. I personally think the lime in this dish is very important for when I tasted it without the lime, I did not like it. The sweetness of carrot blended very well with the onion’s sharp taste. The reason I think I didn’t like the soup without the lime was, I think all the remaining ingredients kinda cancelled out each other on taste and all I could taste was fennel in it. And somehow when the lime was added it brought back the individual ingredients taste back again. I didn’t dwell too much on the chemistry here but I think the lime helped a lot. The only problem I had was, though after 40 minutes in oven, the fennel got cooked, but the onion’s raw taste was lingering in the soup which troubled me a bit. Or May I could blame it on my cooking skills as well. May be onions should be cooked separately, I donno or it could be just that the onions I bought were a bit more powerful. That said, I really enjoyed this soup and so did my friend who shamelessly dropped by to lick the vessel off its base.

The Verdict:
So now to final points,
I would say taste wise I would give this soup a 5 out of 8.
On health factor, I don’t think we can do any better. So its 4 out of 4.
Regarding the ease of cooking, although theoretically I would like to nitpick and complain that now I have to clean the oven plate, blender and a couple of vessels, I am sure Rajee will argue back saying that the point is just for ease of cooking and not on ease of cleaning. So I would give her 6 out of 6 as well on that.
And finally the uniqueness factor, well I have never made or heard of soup where I grill the veggies in the oven and grind it, I donno about others but the novice cooker I am, that’s new and unique to me. So I would give the entire 2 points to it.

So its 5 + 4 + 6 + 2 that is 17 out of 20.

Conclusion:

Well, if you have listened to this clip this far, either you should be rajee or her husband mothi or you should be some really jobless person who doesn’t know how to pass time. Just kidding.
Thanks for reading the “Me myself and the chef” challenge review number 1. I am looking forward to meet everyone again at Rajee’s blog sometime next week with review number 2. Till then I wish everyone a great week ahead. Thank you.

-------------------------------------------------------------------------------

Enjoy !!